
Part 1: The less user-friendly replacement of the sealing rings on the propeller shaft of the Saildrive SD60
Part 2: Constructive solution for easier replacement of the sealing rings further down on this page.
See also the videos on my YouTube channel: Tips and advice on the technology of sailing yachts
If the saildrive develops a leak at the propeller shaft and water enters the gearbox oil, a gearbox oil and seal replacement is urgently required to prevent further corrosion damage from saltwater in the saildrive. This applies to all saildrives on the market.
However, the Yanmar SD60 saildrive has a unique feature. Replacing the seals in the bearing plate requires first removing an outer bearing race. This requires specialized knowledge and tools.
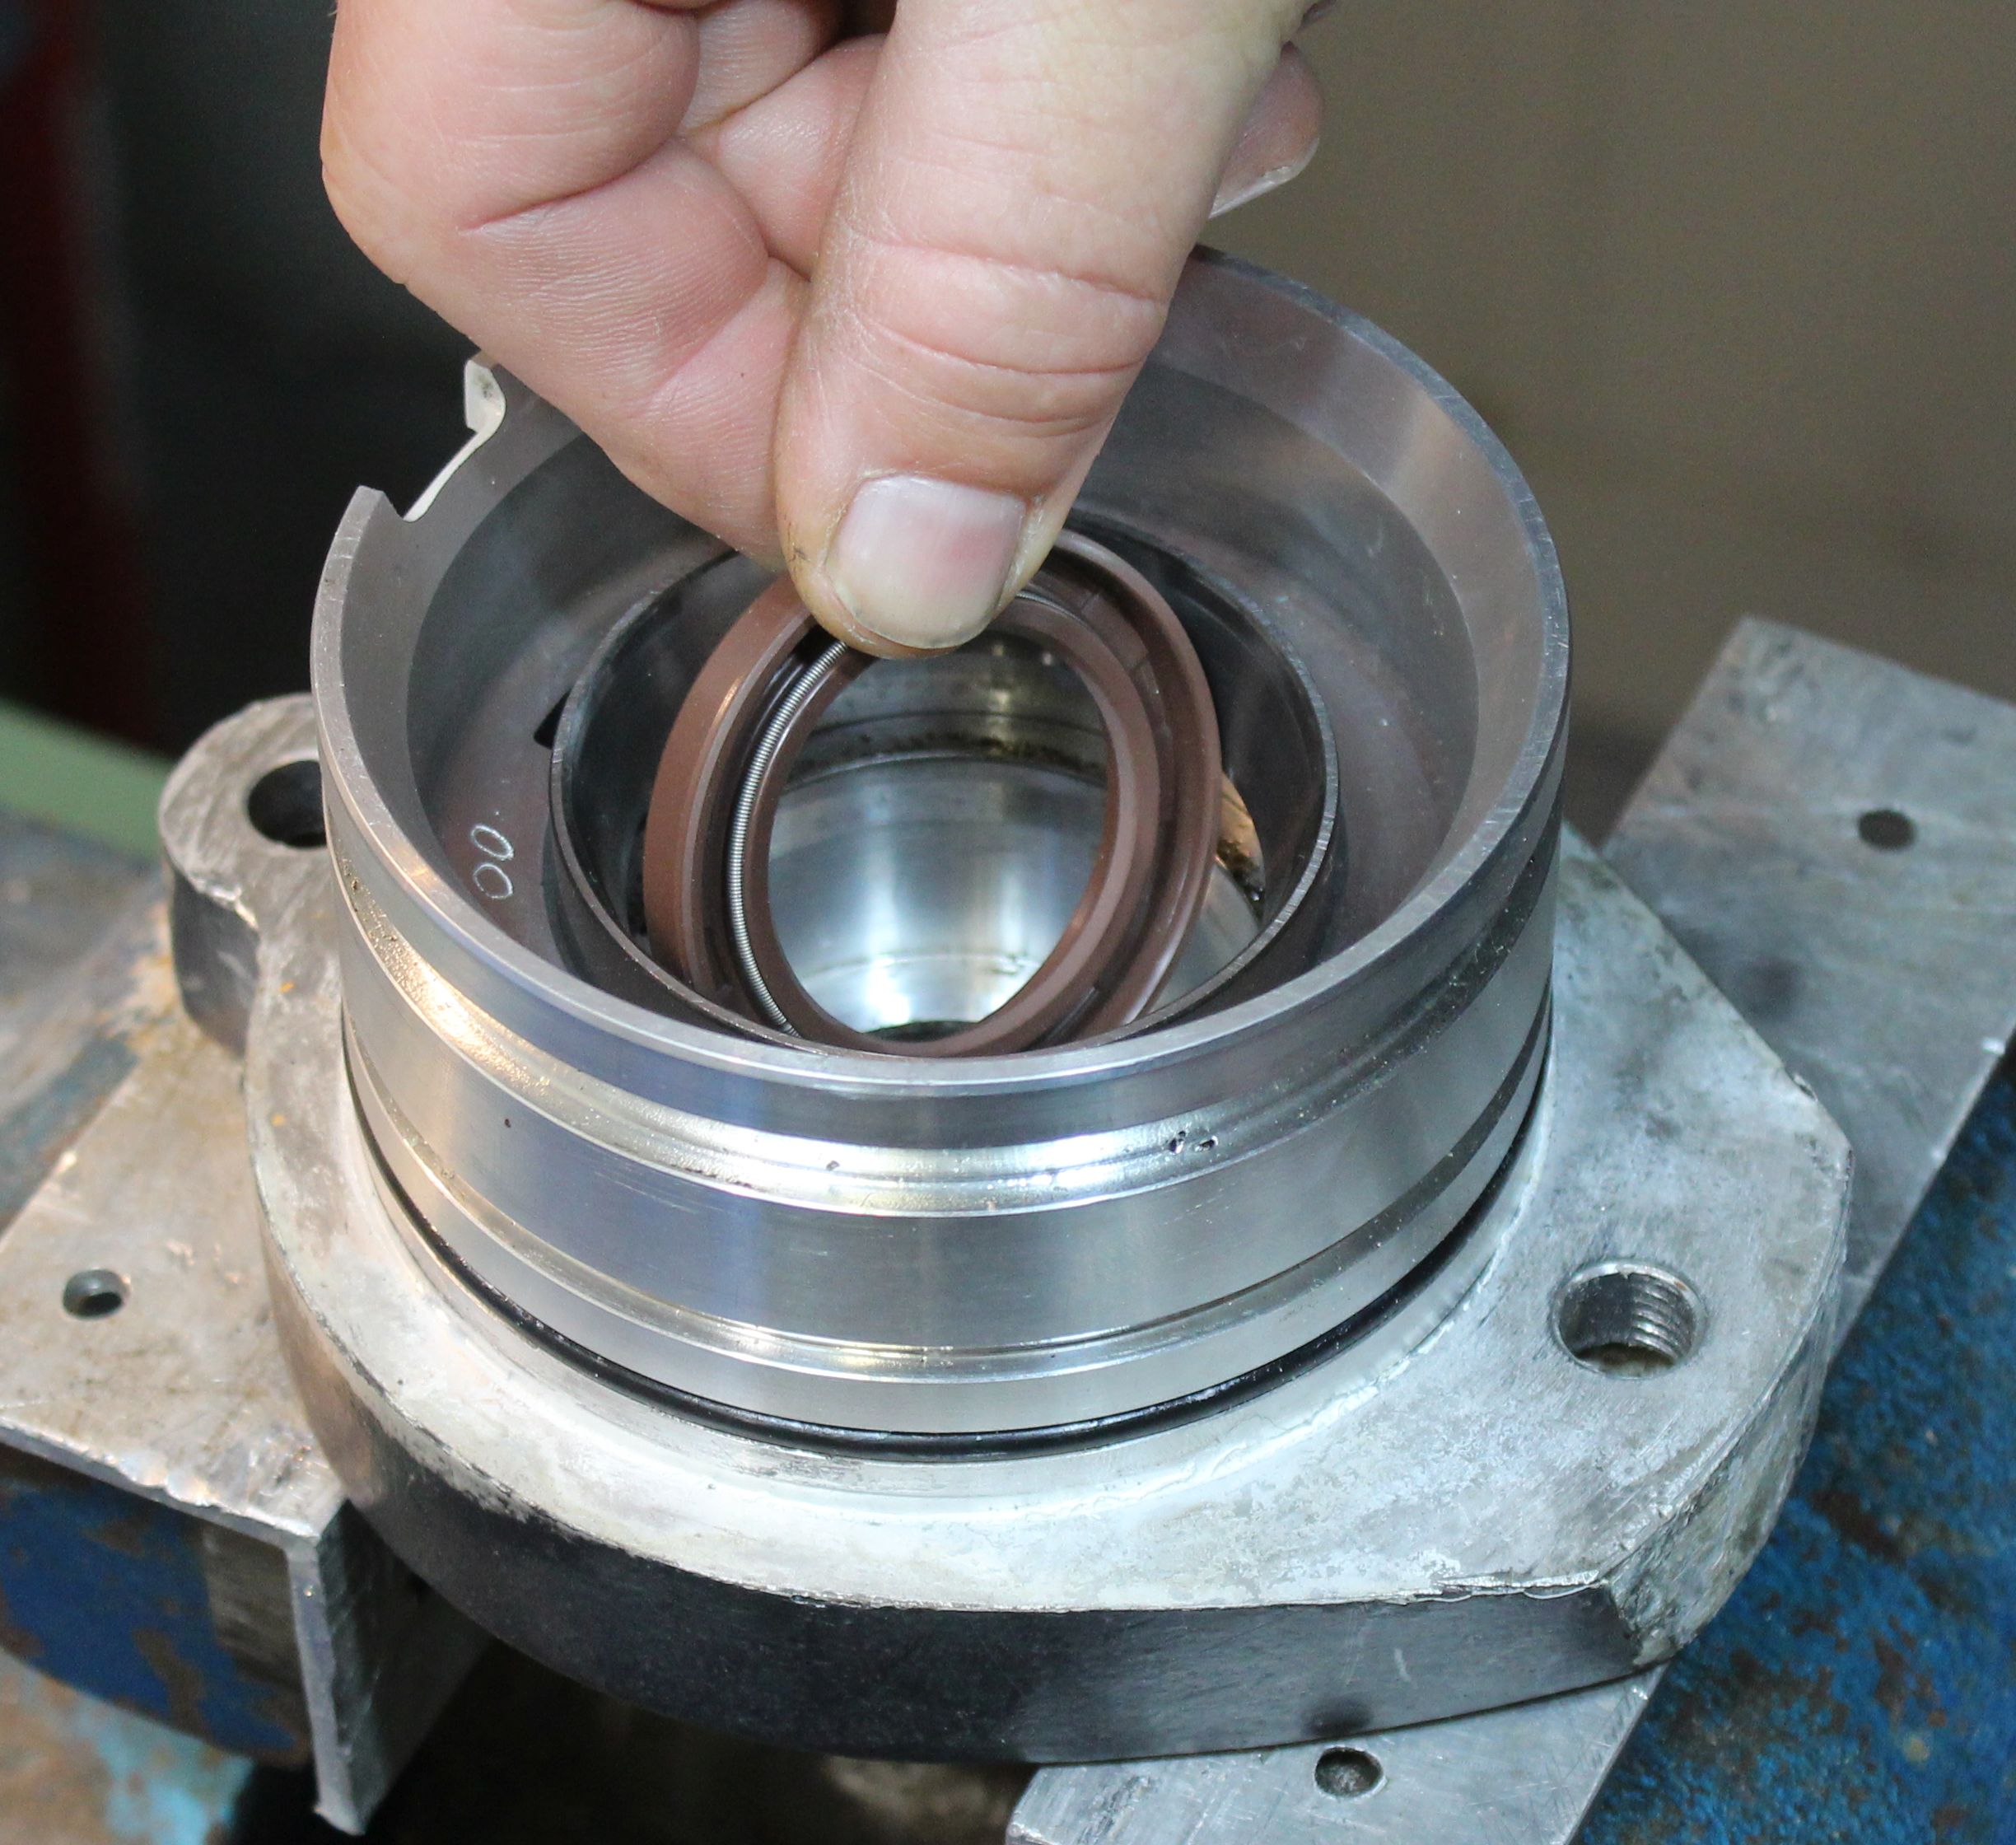
The new sealing ring does not fit through the bearing ring.
As a reminder:
I've already described the replacement of the sealing rings on the SD40/SD50 and the poor quality of the original Yanmar sealing rings on my website and on my YouTube channel. I've also mentioned that these sealing rings started to rust very quickly and were often completely rusted through after just a few years.
Yanmar SD 50 Experiences with the original Yanmar radial sealing rings for the SD50 (SD40) (in German Languarge)
Replacing radial seals and renewing the running surface on a Yanmar SD40 / SD 50 (in German Languarge)
The basic principle of replacing the sealing ring is identical to that of the SD40/SD50 Saildrive. In this repair report, I will only address the key differences.
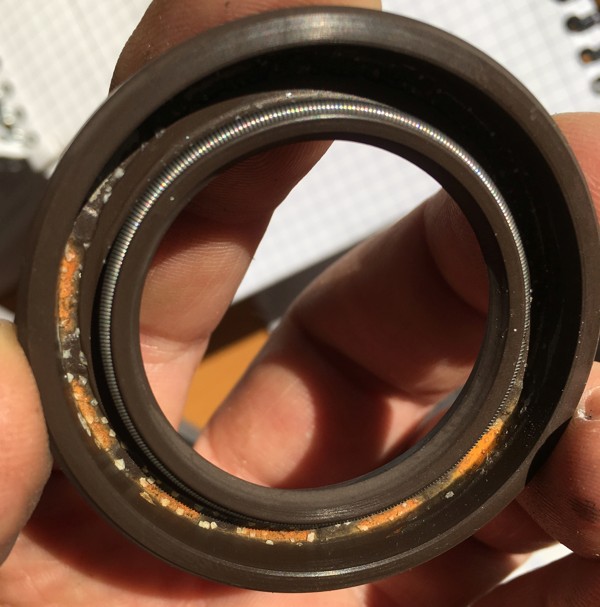

Left: Original Yanmar SD50 sealing ring, once submerged in the sea.
Right: ...after approximately 5 years.
The Yanmar Saildrive SD60 (manufactured by ZF) uses a new sealing ring, this time from the market leader Freudenberg. While this ring also has an open support ring, it is coated with an adhesion promoter for the elastomer that also provides some corrosion protection. According to Freudenberg, the corrosion protection should last approximately 5 years, depending on the water environment.
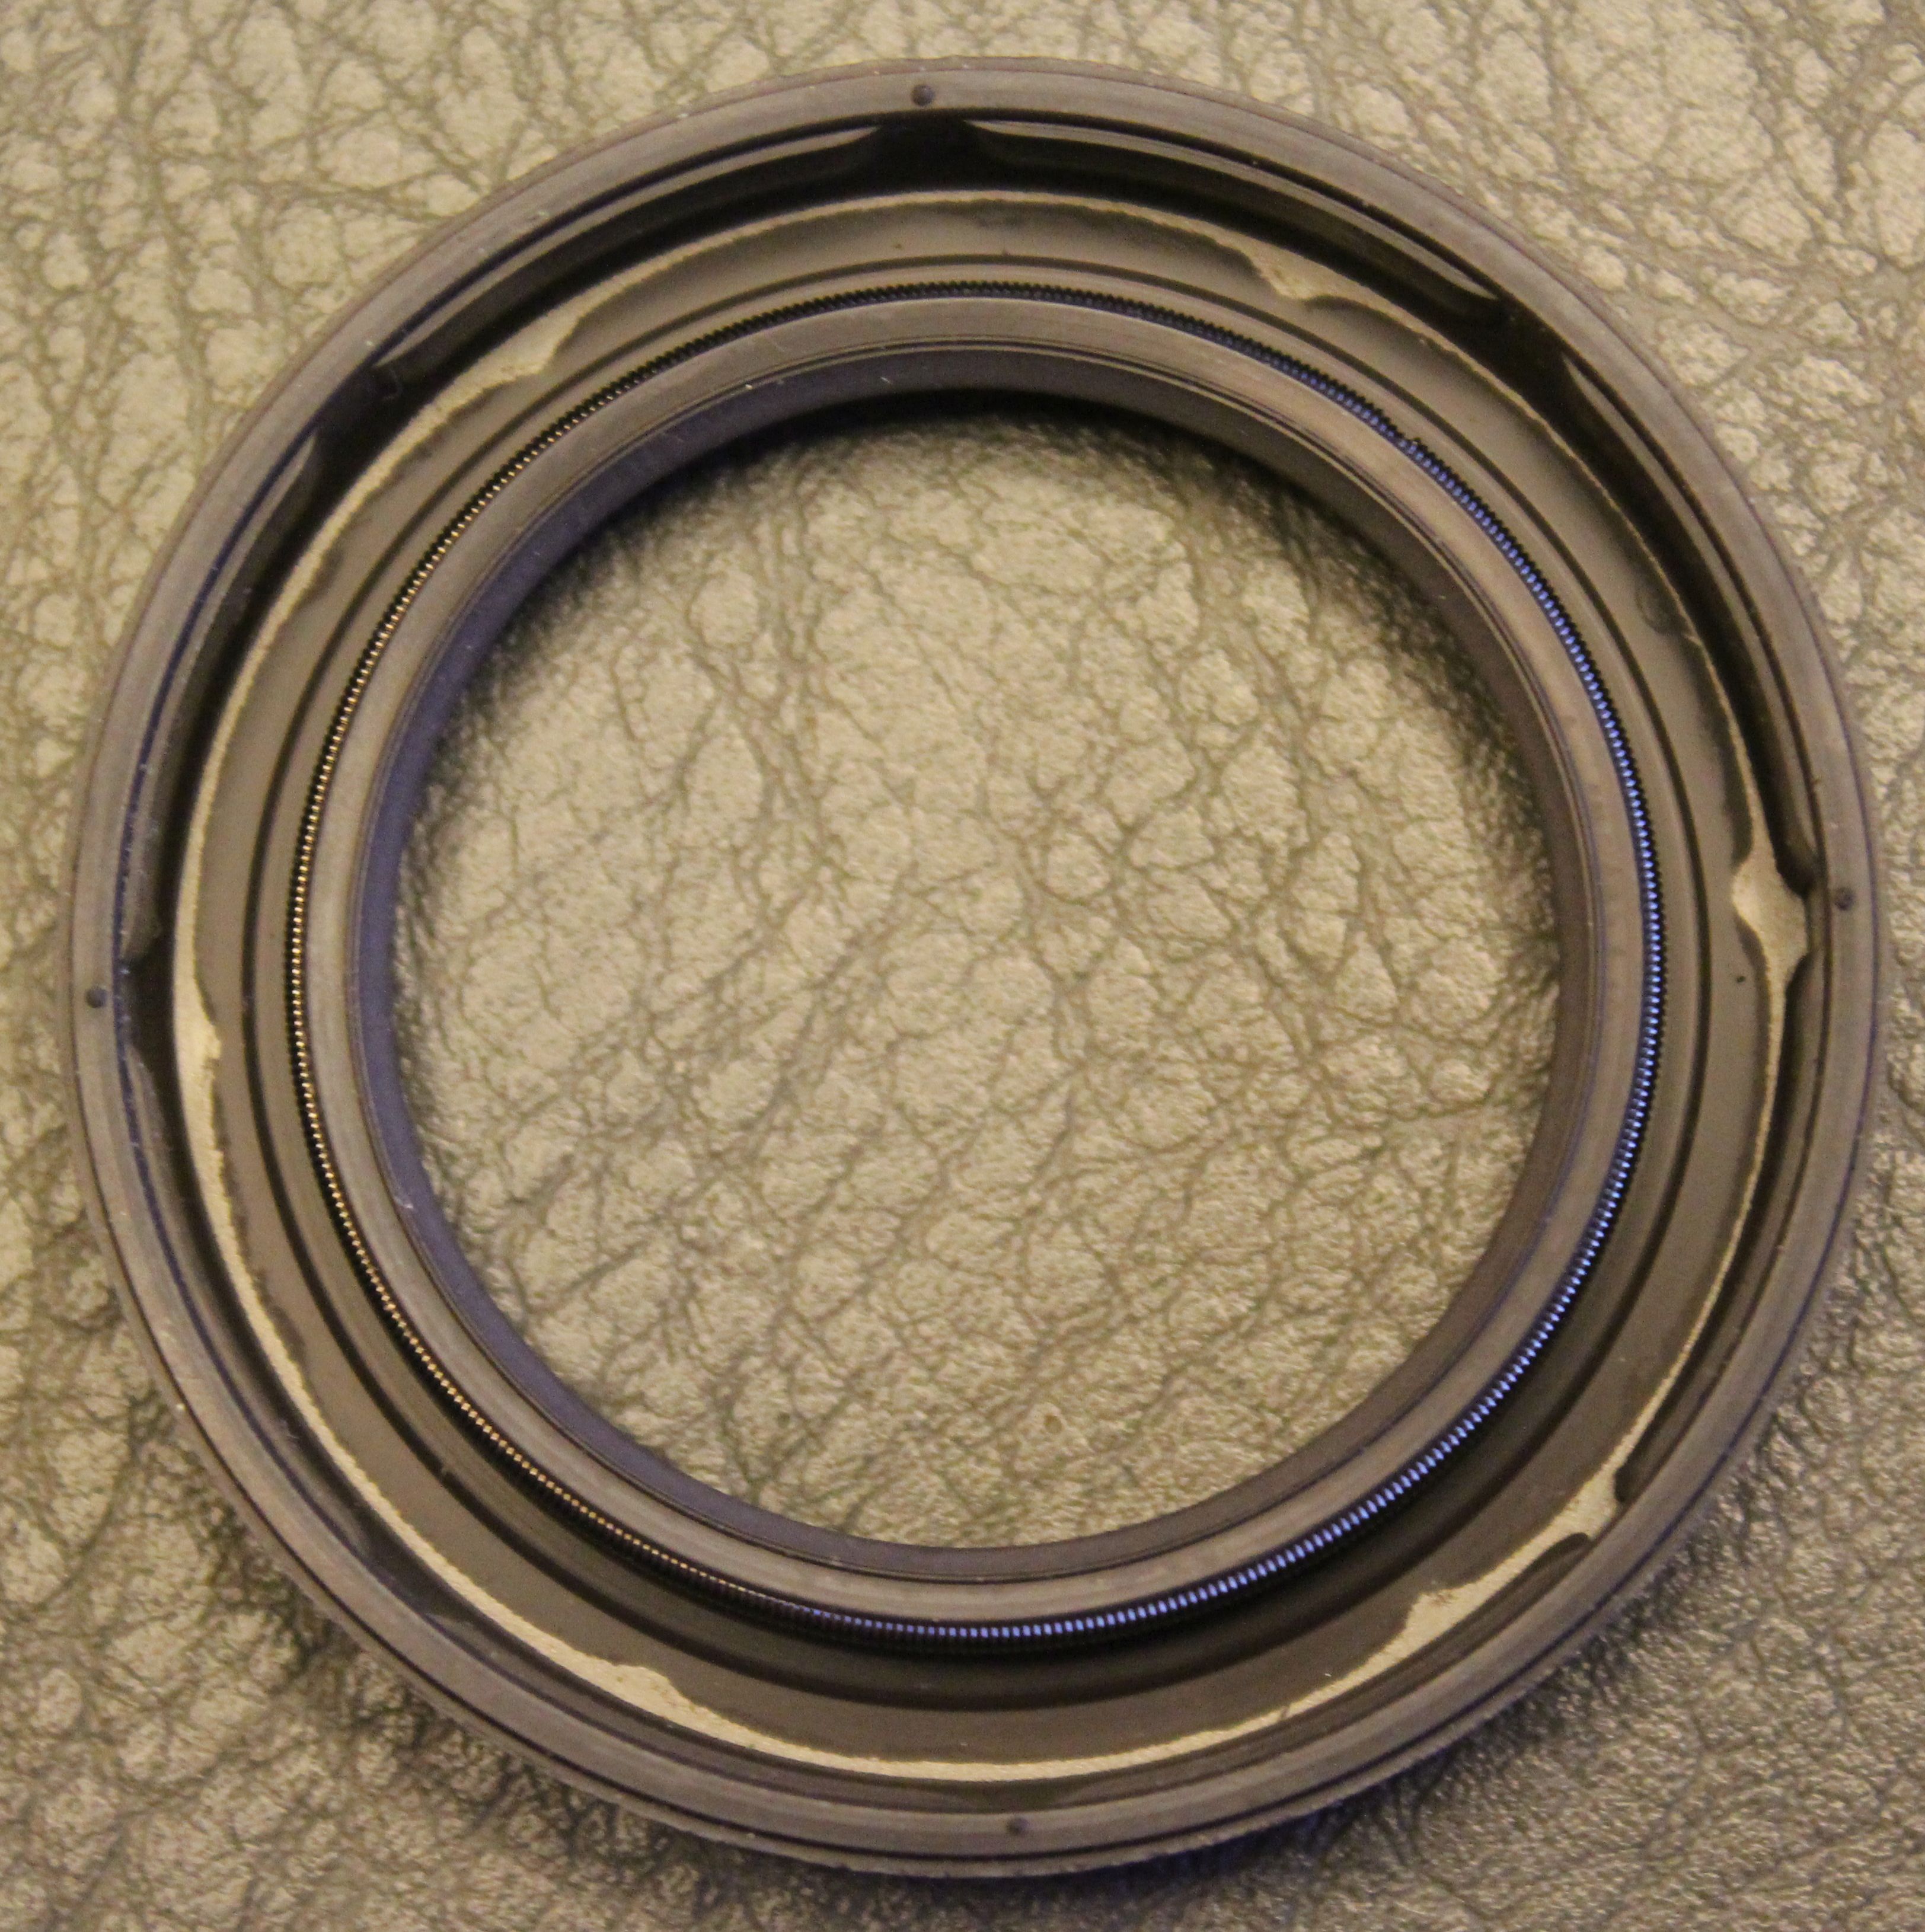
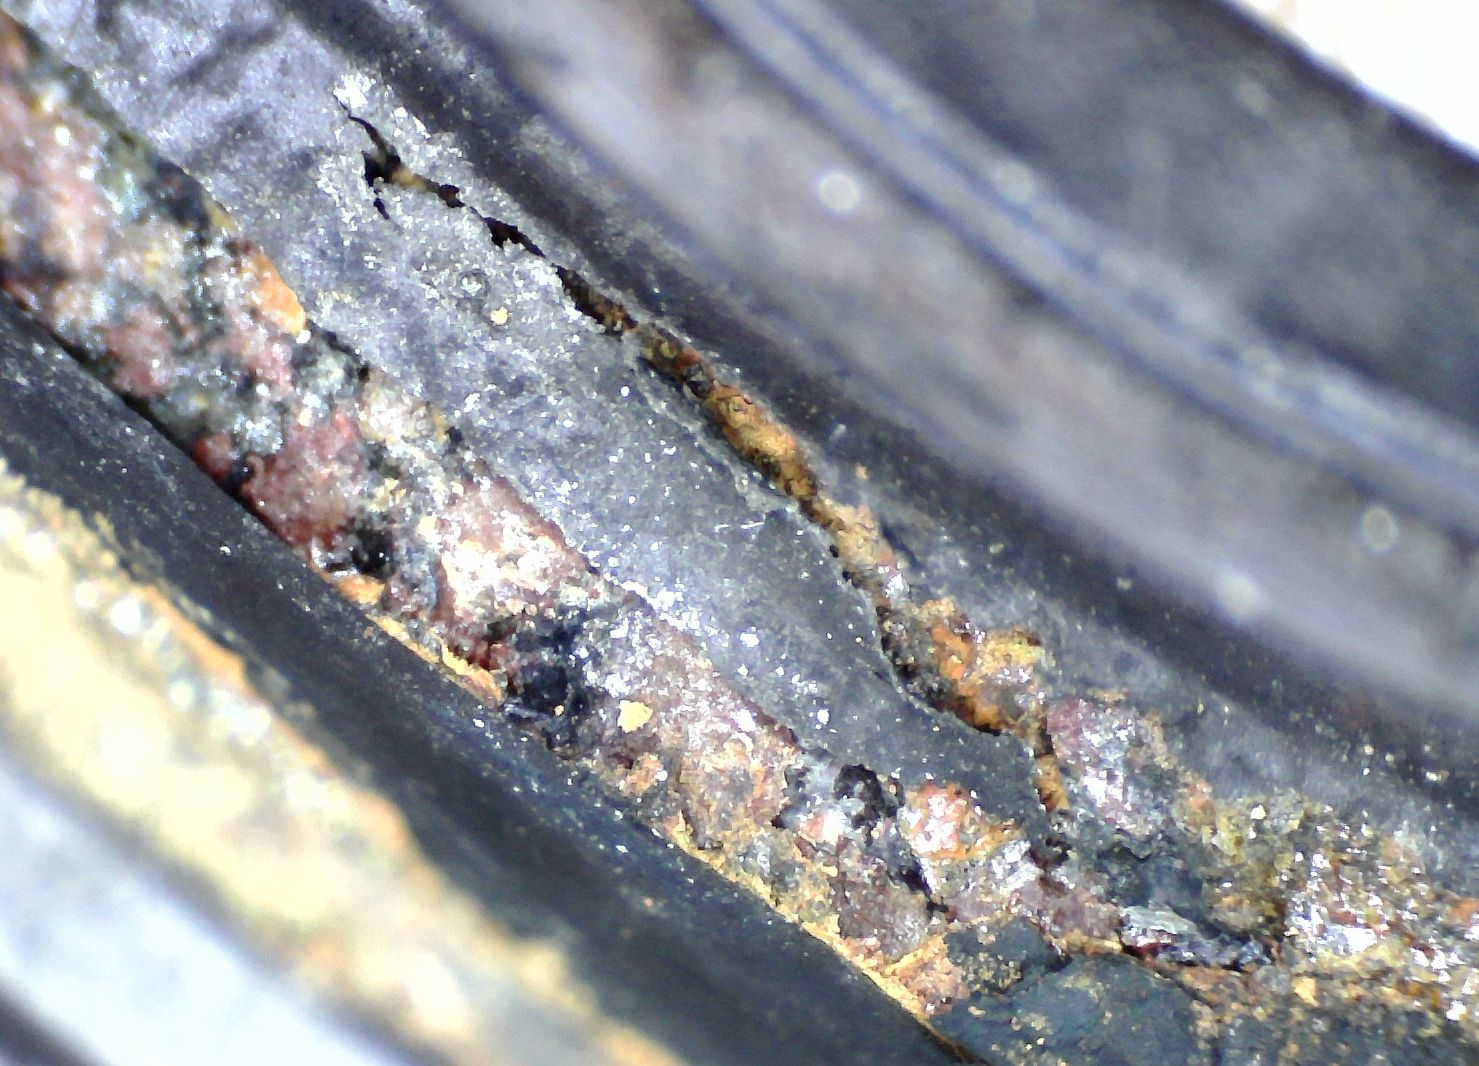
Left: Open support ring in the original Yanmar SD60 part.
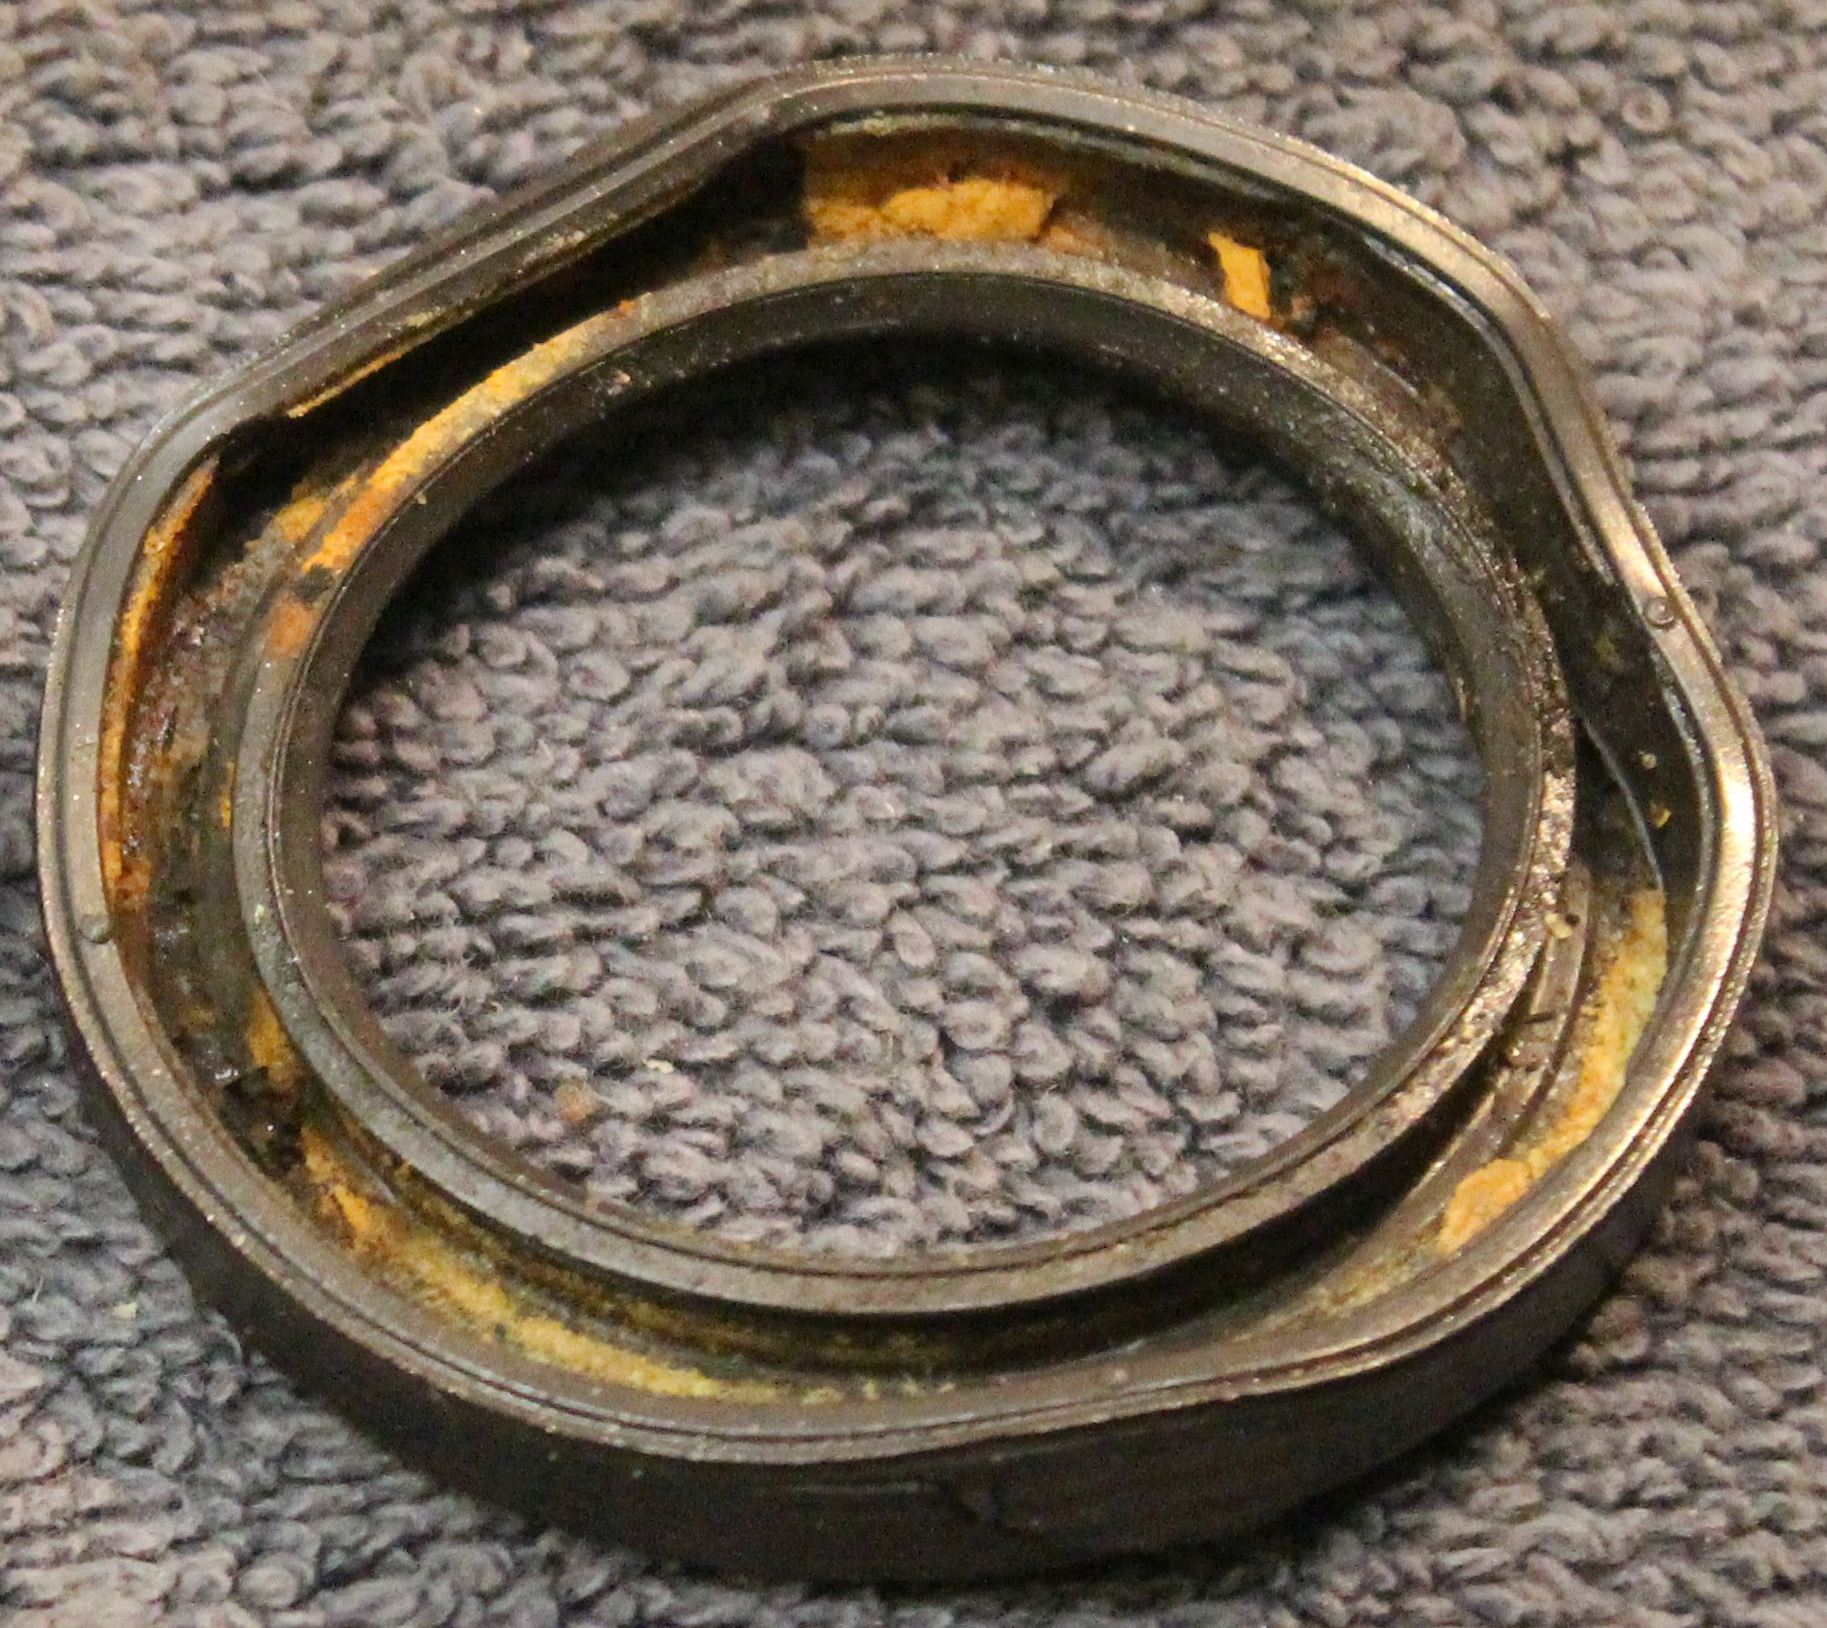
Center: After 3 years of use, showing extensive rust on the support ring.
Right : Rusted support ring in the original Yanmar SD60 sealing ring. 25x magnification.
Unfortunately, it doesn't last as long as advertised. This aligns with my opinion based on the other repair reports mentioned above. At least every three years, for example when the underwater paint is renewed, the radial seals and oil change should also be performed on the SD60.
What I then experienced while replacing the sealing rings really surprised me. How can such a user-unfriendly design be put on the market? Doesn't anyone in the design offices think about the sailor who finds themselves off course and encounters this technical problem of leaking radial seals? Furthermore, leaking radial seals on the drive system, caused by lines and fishing lines, are not uncommon at all.
The problem:
The diameter of the sealing ring is larger than the opening of the bearing ring, see the cover image and the following image.
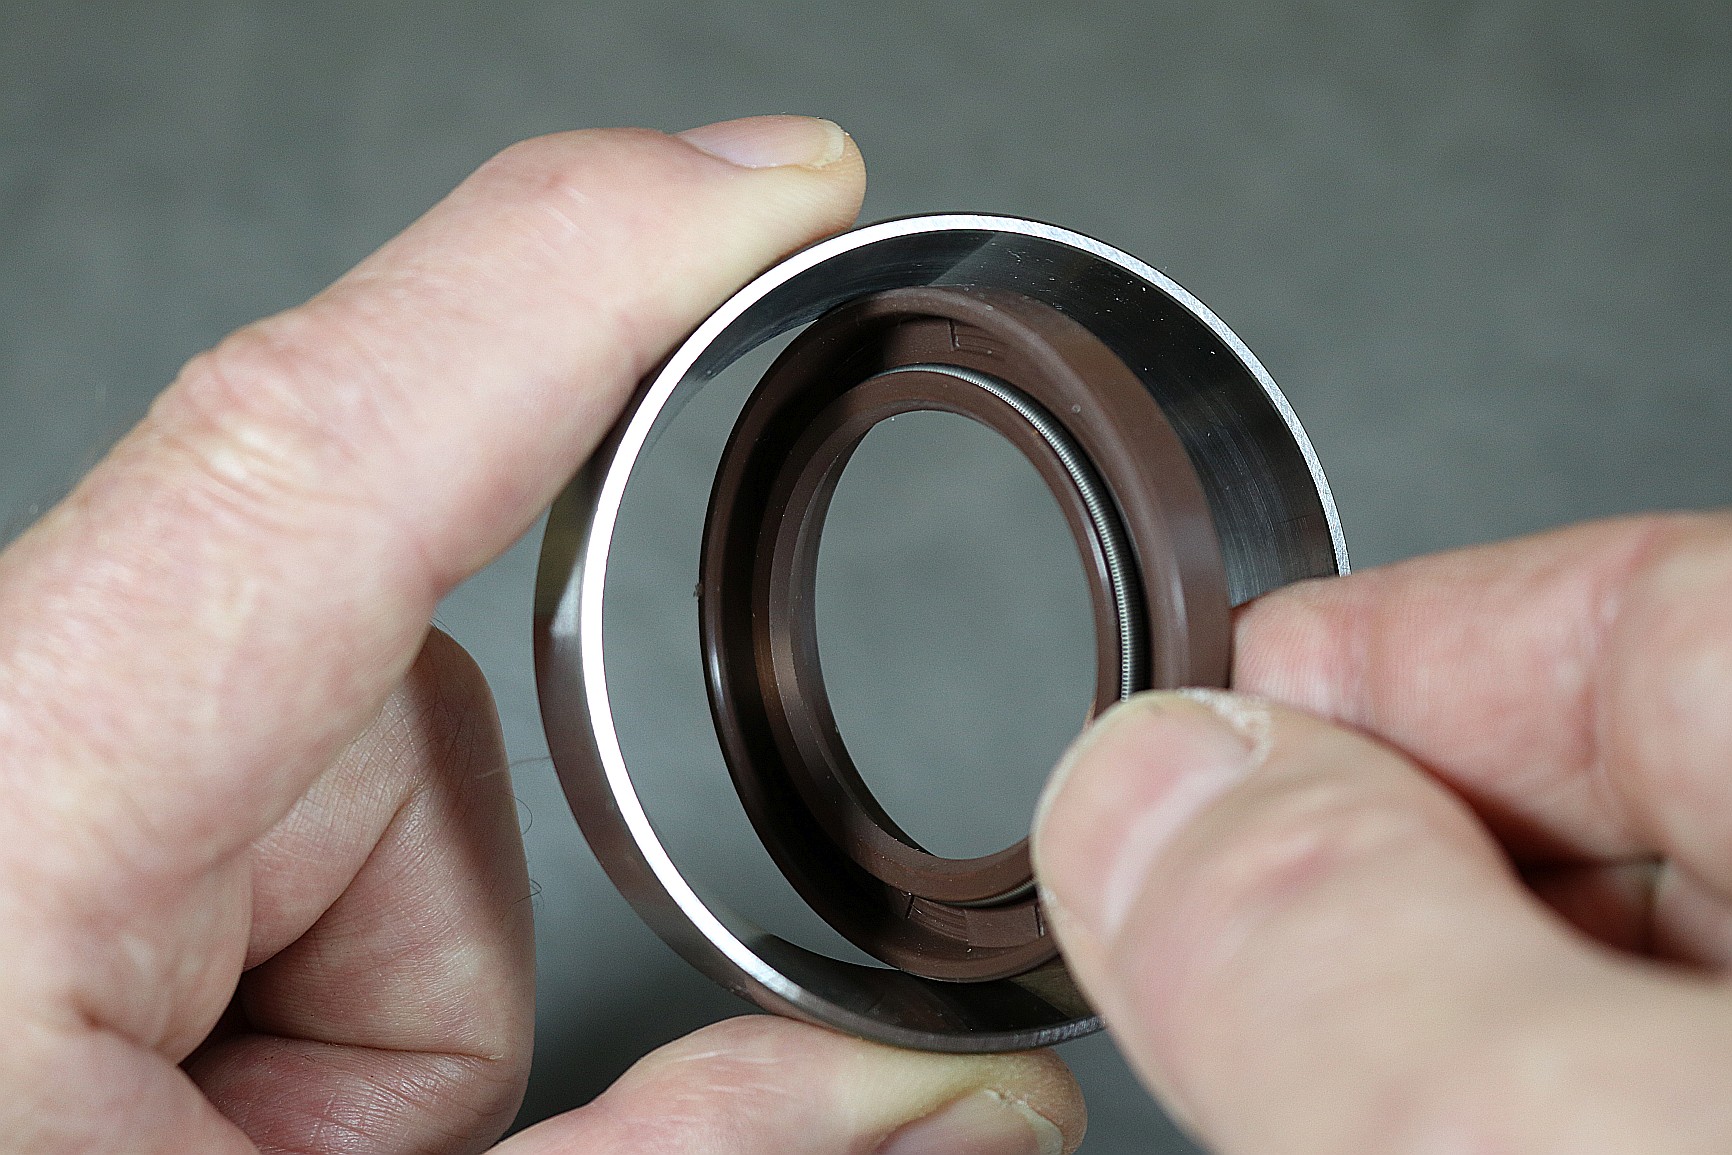
This isn't necessarily a problem during removal. The sealing rings are defective anyway. The sealing ring can be cut open and removed with side cutters.
The bearing ring must be removed and reinstalled at the latest when installing the two new sealing rings. This requires special tools and a bit of experience, which I would like to share here.
Required tools:
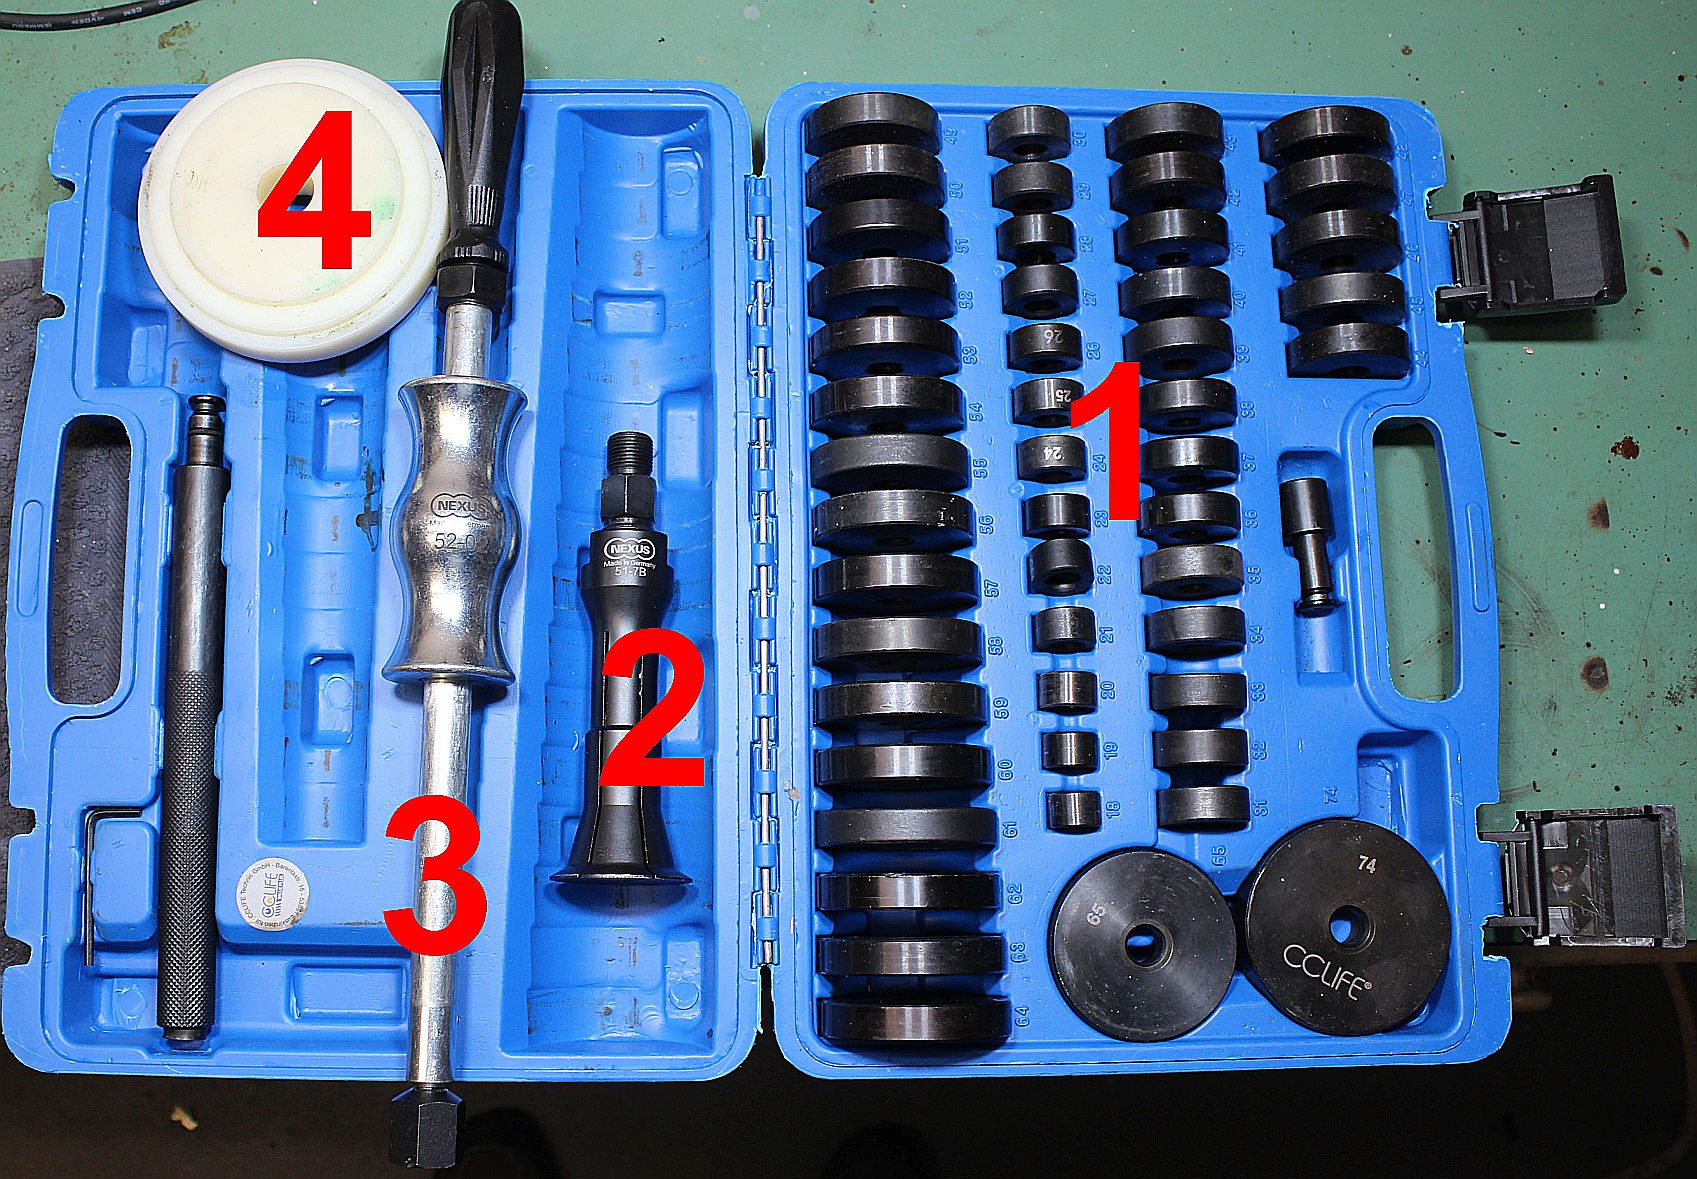
1: Case Bearing driver/ Seal driver (with discs from 18Ø - 65Ø and 74Ø)
2: Internal puller Nexus 51-7B
3: Slide hammer: Nexus 52-02
4: DIY Tool: Centering adapter consisting of a 120mm diameter and 30mm thick nylon or PE disc with a matching center hole for the bearing driver bolt. Machine a suitable taper on a lathe to fit the saildrive foot and bearing plate.
Removal of bearing ring and sealing ring:
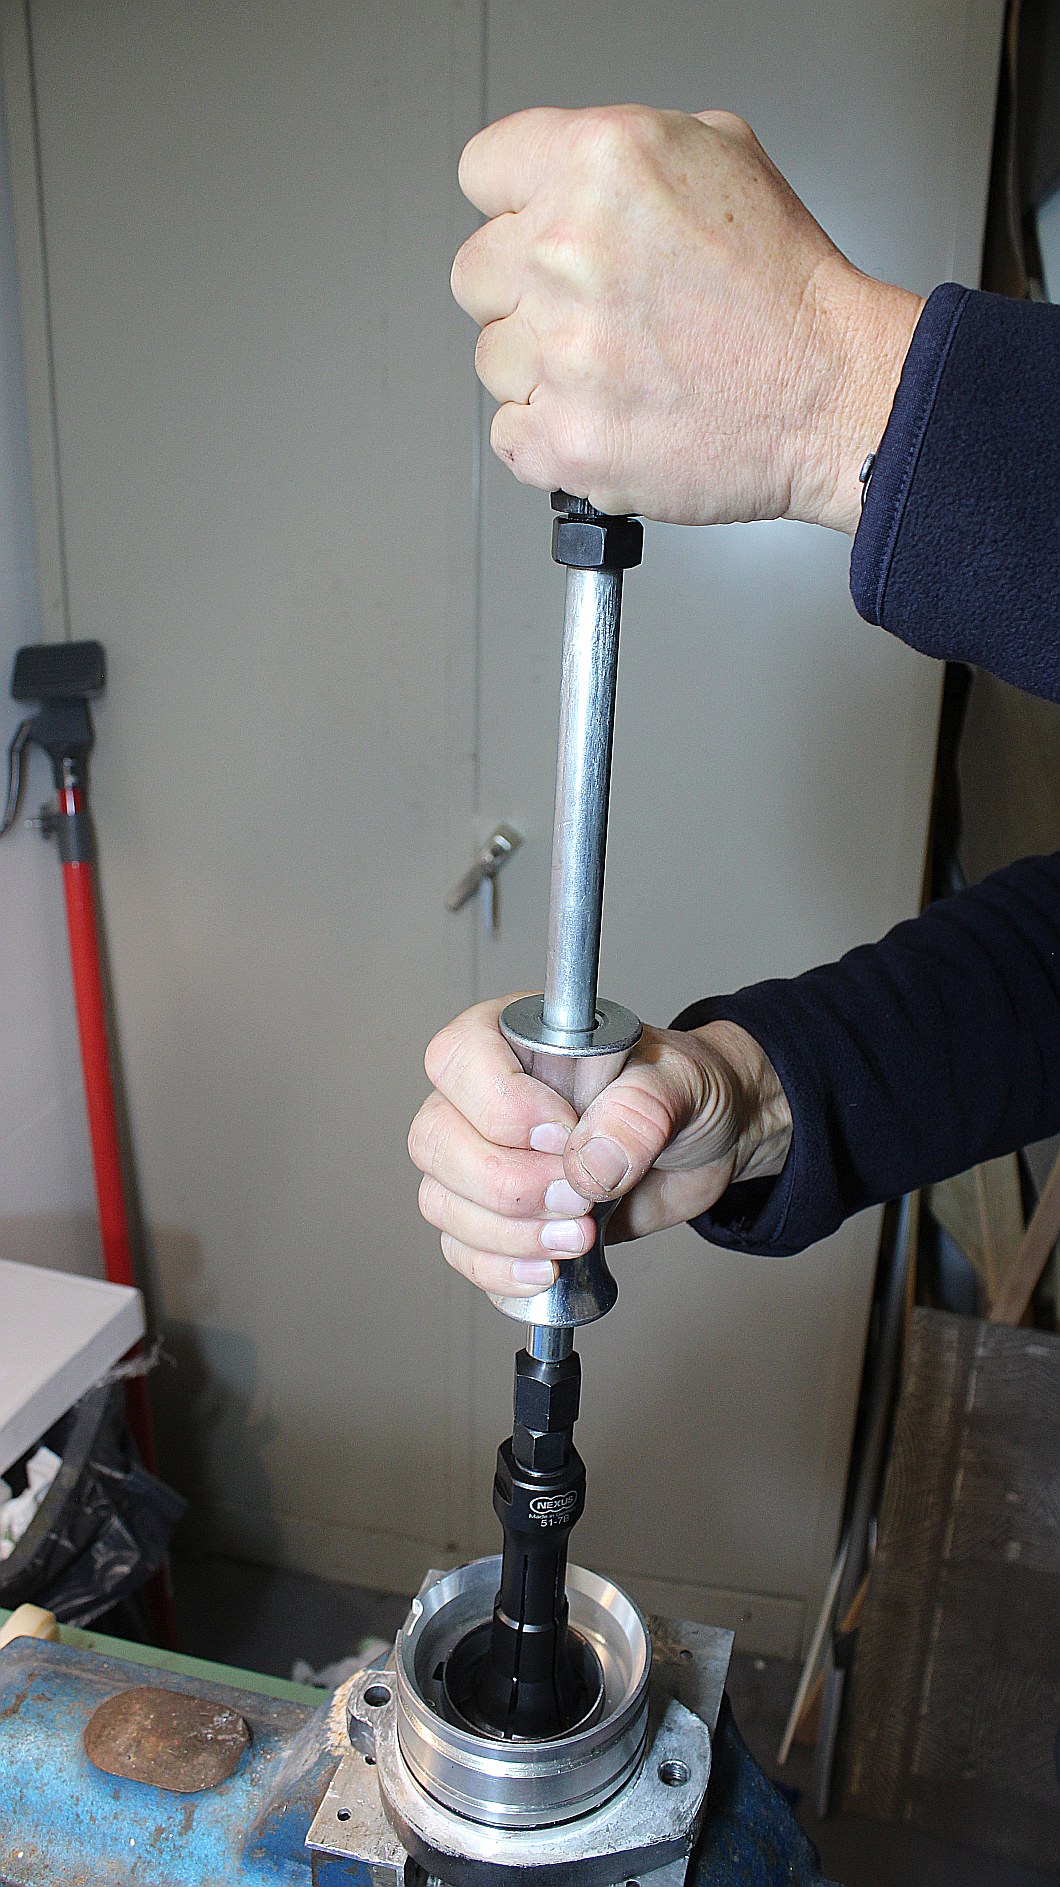
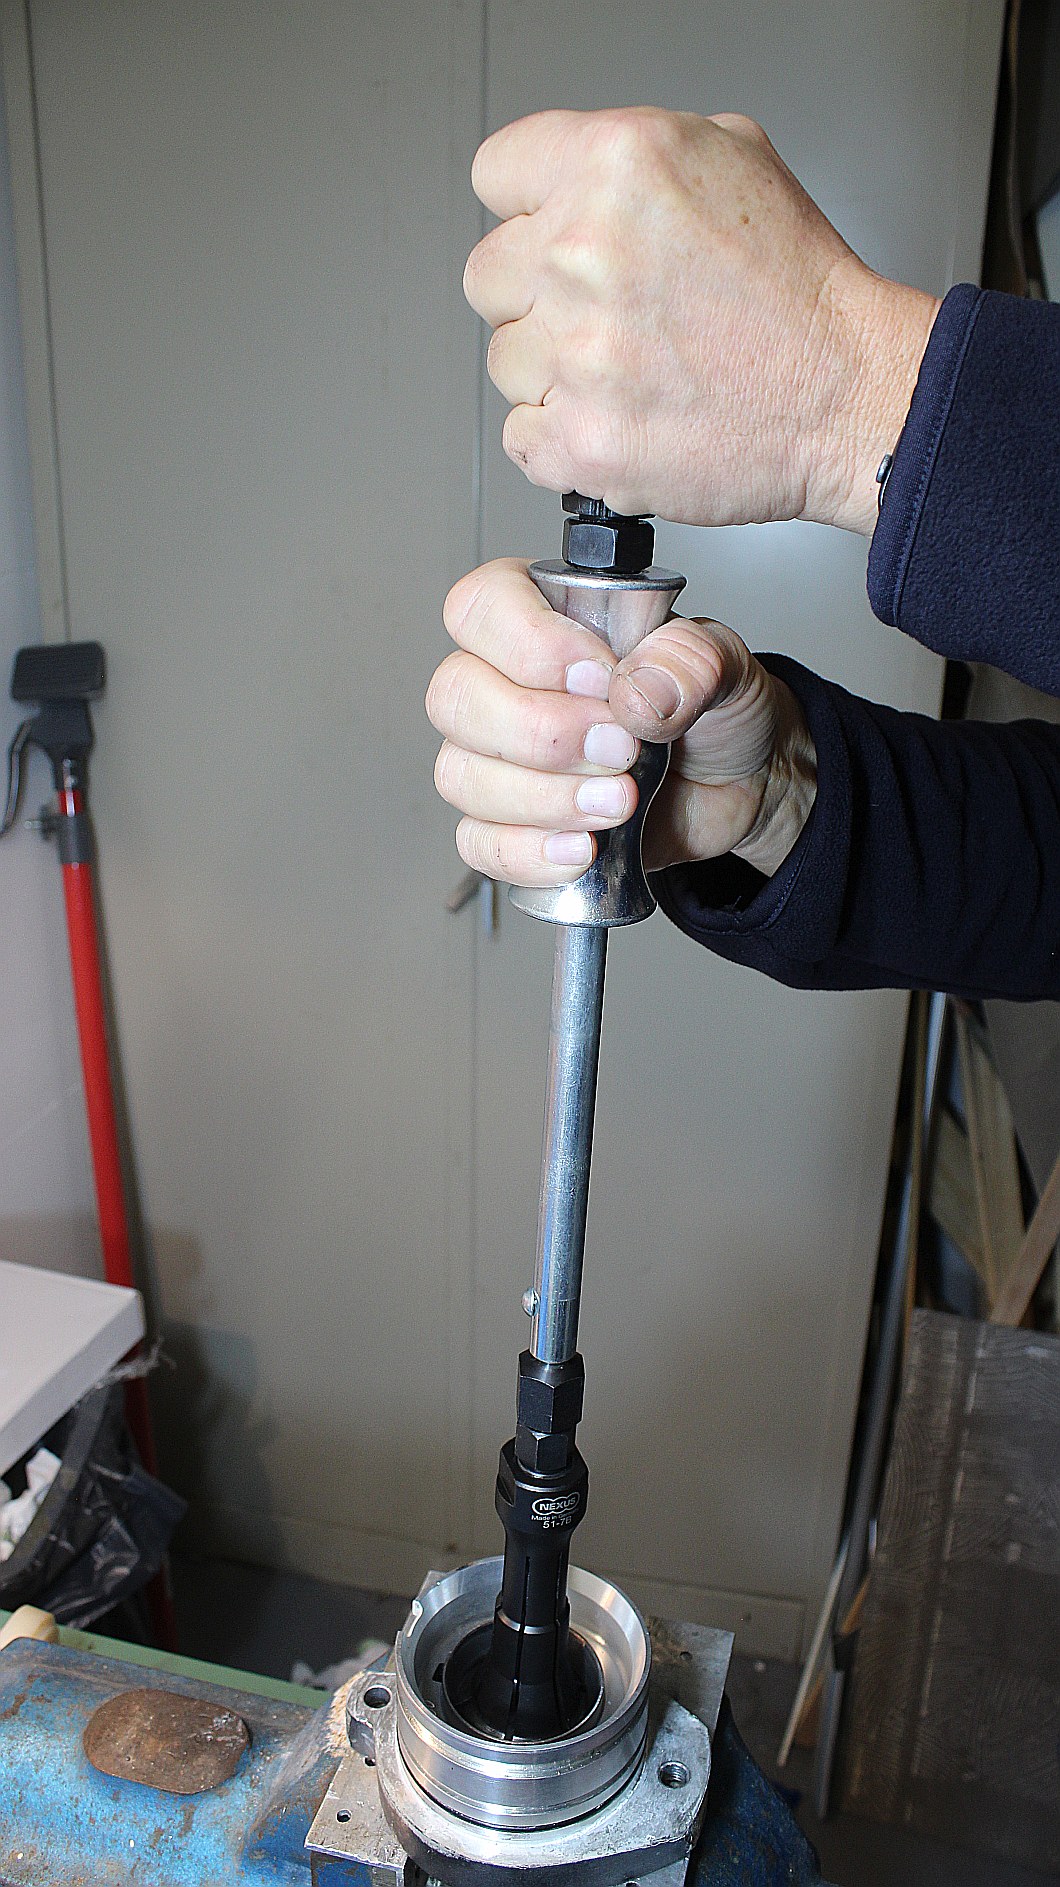
Left: The bearing flange is clamped in a vise. The internal puller is positioned under the bearing race and, by tightening the nut on the internal puller, is spread open and thus secured under the bearing race. Then the slide hammer is attached to the internal puller. Firmly grip the weight of the slide hammer by hand and strike it forcefully upwards.
Right: The slide hammer stops at the upper handle, the jolt is transferred to the bearing ring and it comes out of its seat after a few blows.
There are thin shims located beneath the bearing ring. These are salvaged and must be reused later.
Installation of the sealing rings:
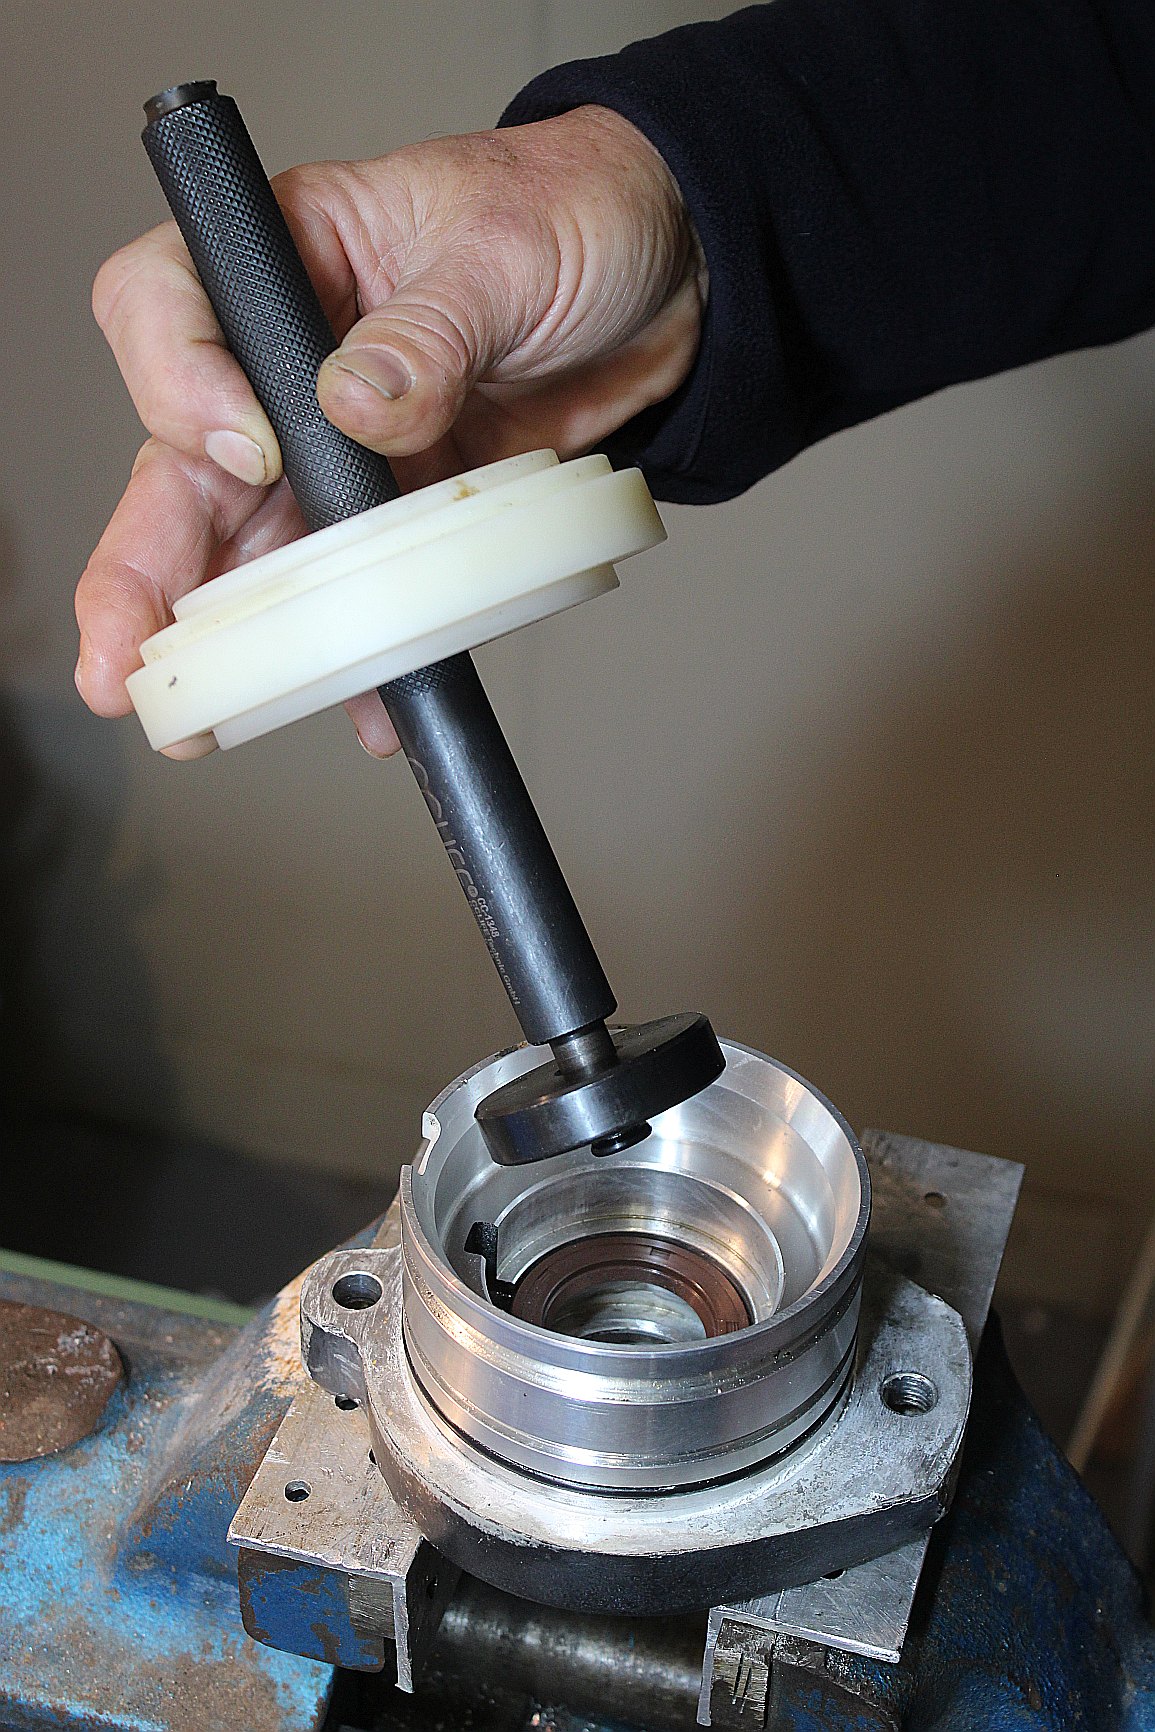
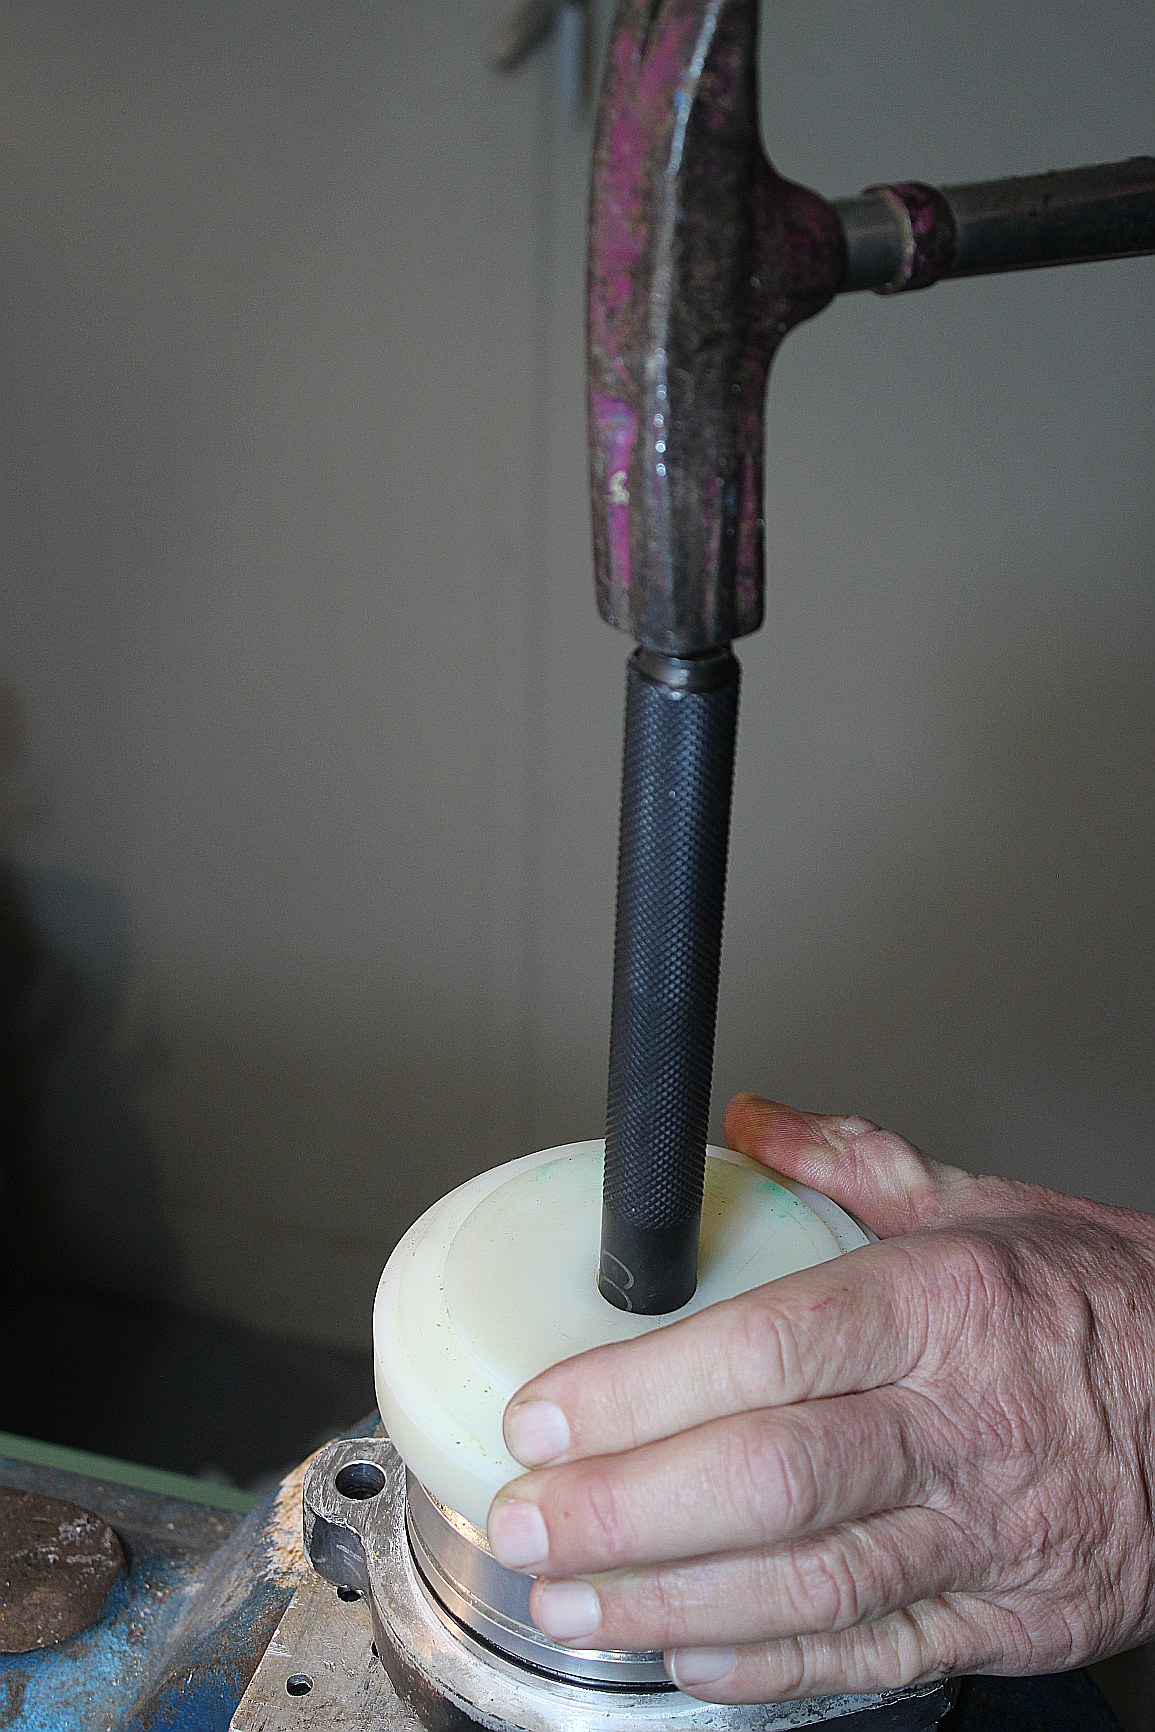
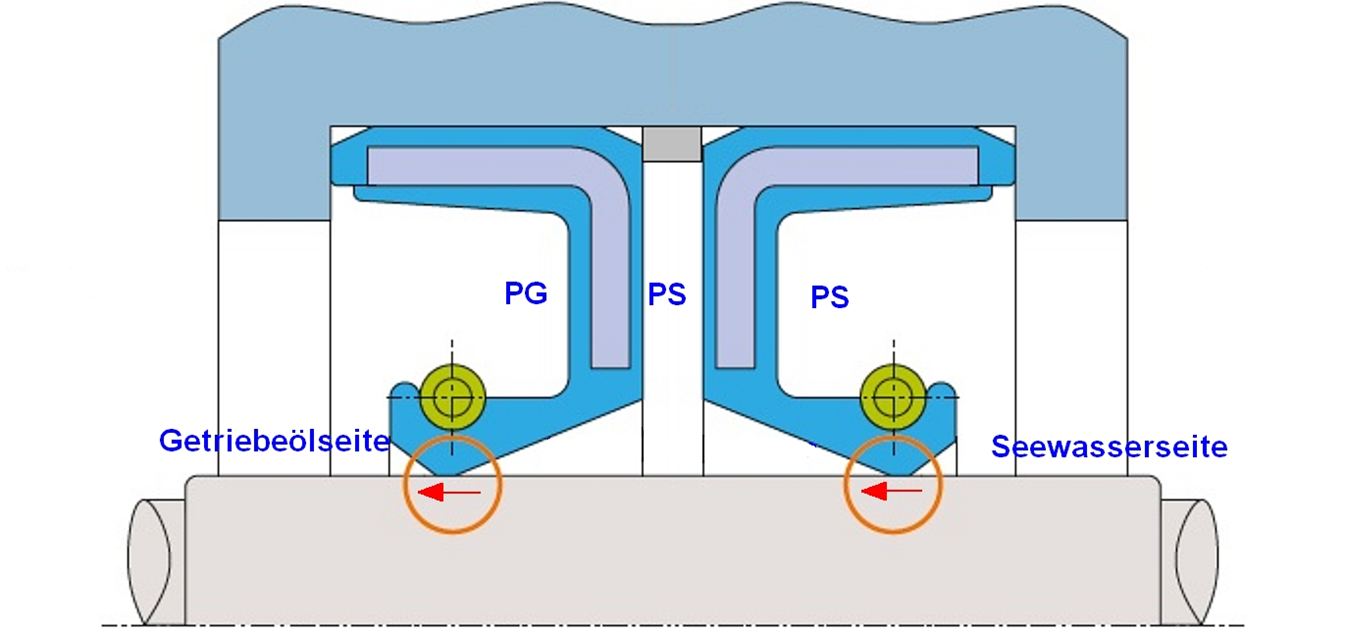
Top left image : The sealing rings are then inserted individually into the bearing flange (the right way round, as shown). The lower sealing ring is inserted with the coil spring facing down, and the upper sealing ring with the coil spring facing up. Using the bearing driver and the appropriate washer (here 52 mm), the sealing rings are driven into the bearing flange.
Top right image : The centering adapter has an edge that fits into the bearing flange and holds the driver precisely in the center. This ensures that the sealing rings are guided straight into the bearing flange until they reach the stop.
If the sealing rings are seated at an angle in the bearing flange, the sealing lip describes a wave-like motion on the drive shaft. This leads to leakage, even with a new sealing ring.
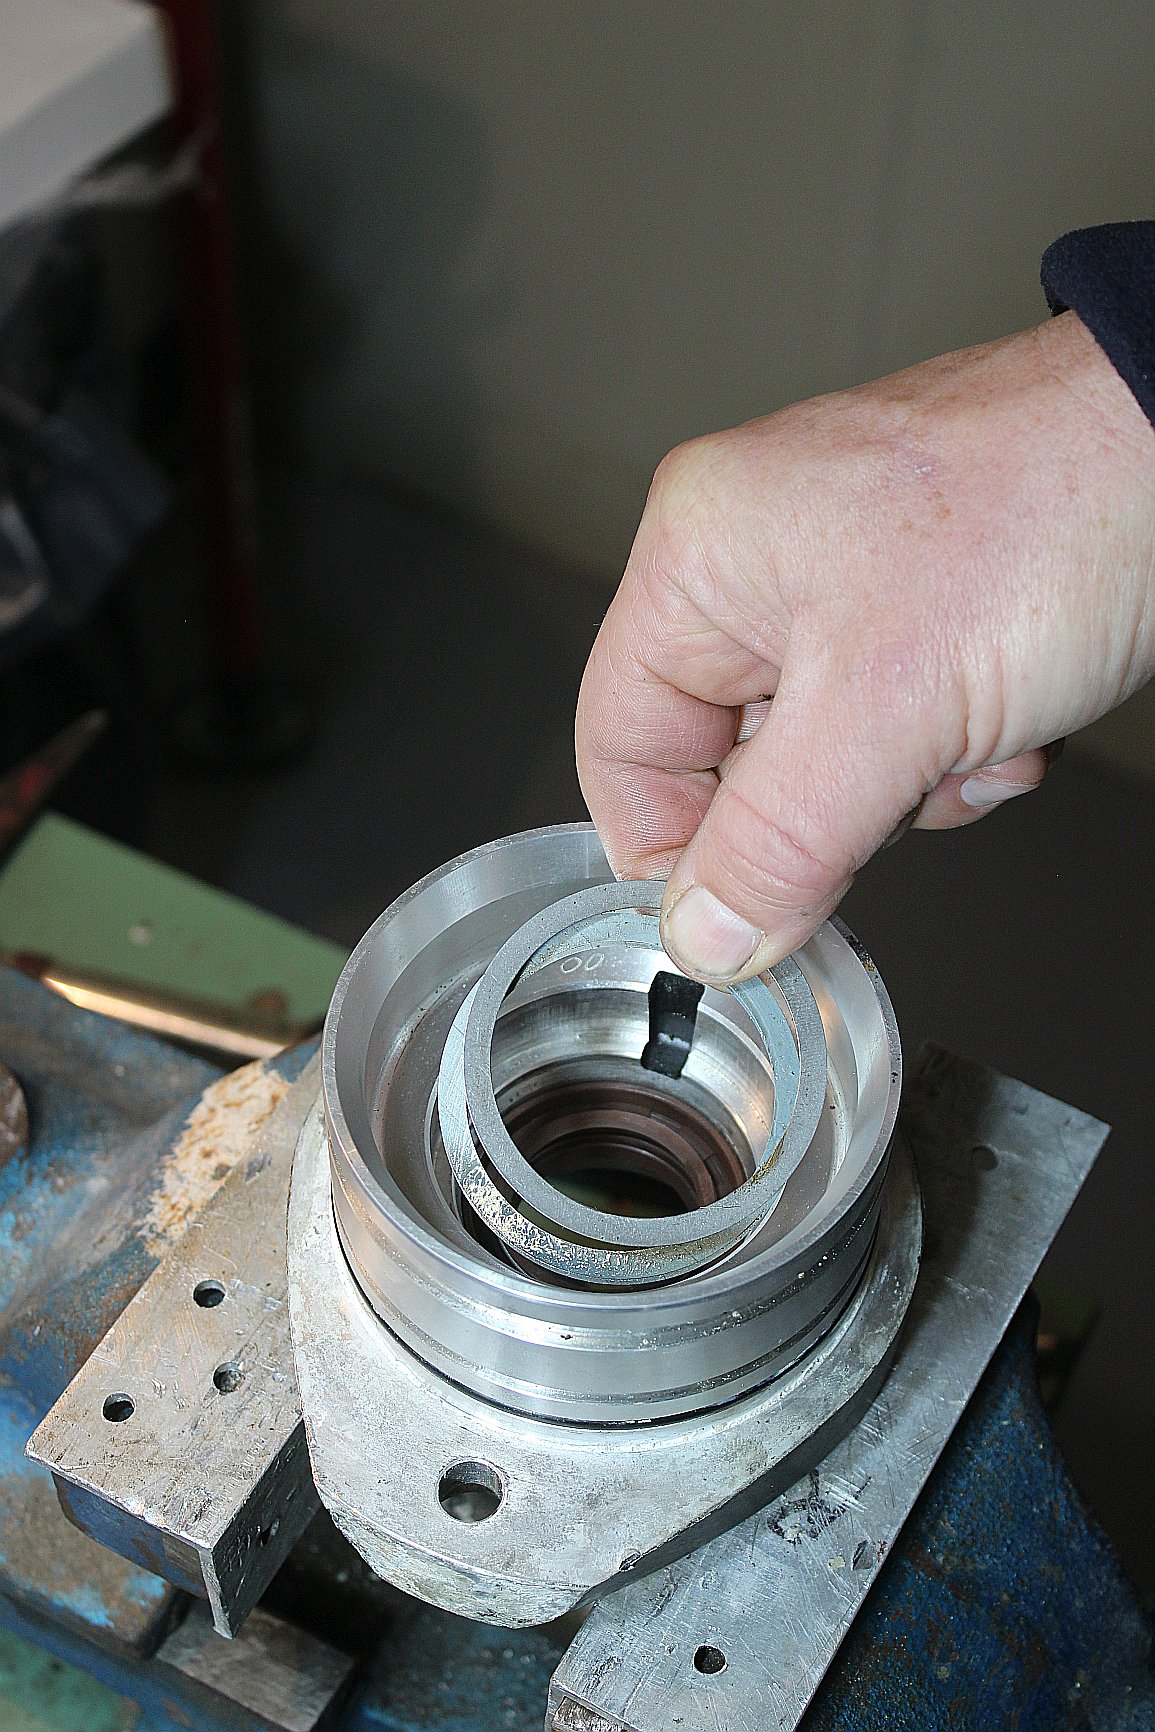
Left: After the two sealing rings have been installed, the shims are first placed back into the bearing race .
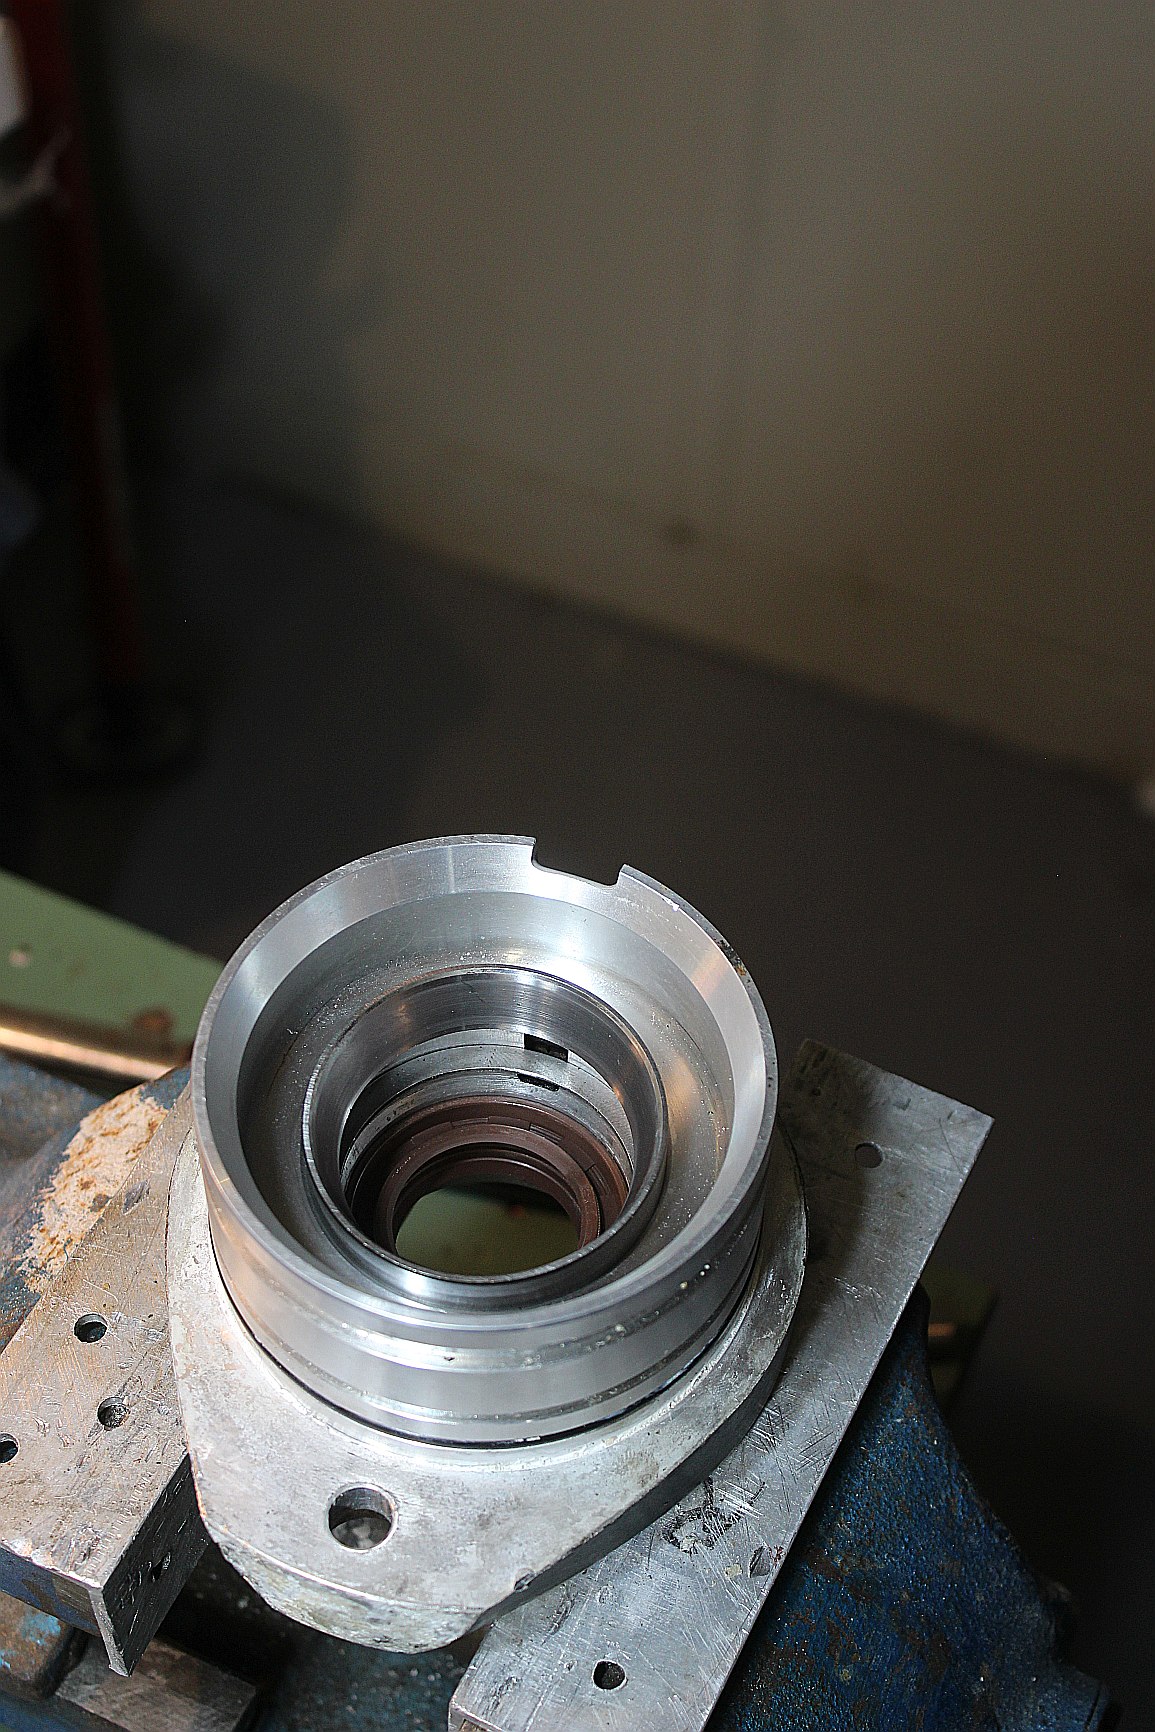
Right: Then the bearing race is placed onto the bearing race. Cooling the bearing race to -20°C makes it easier to insert.
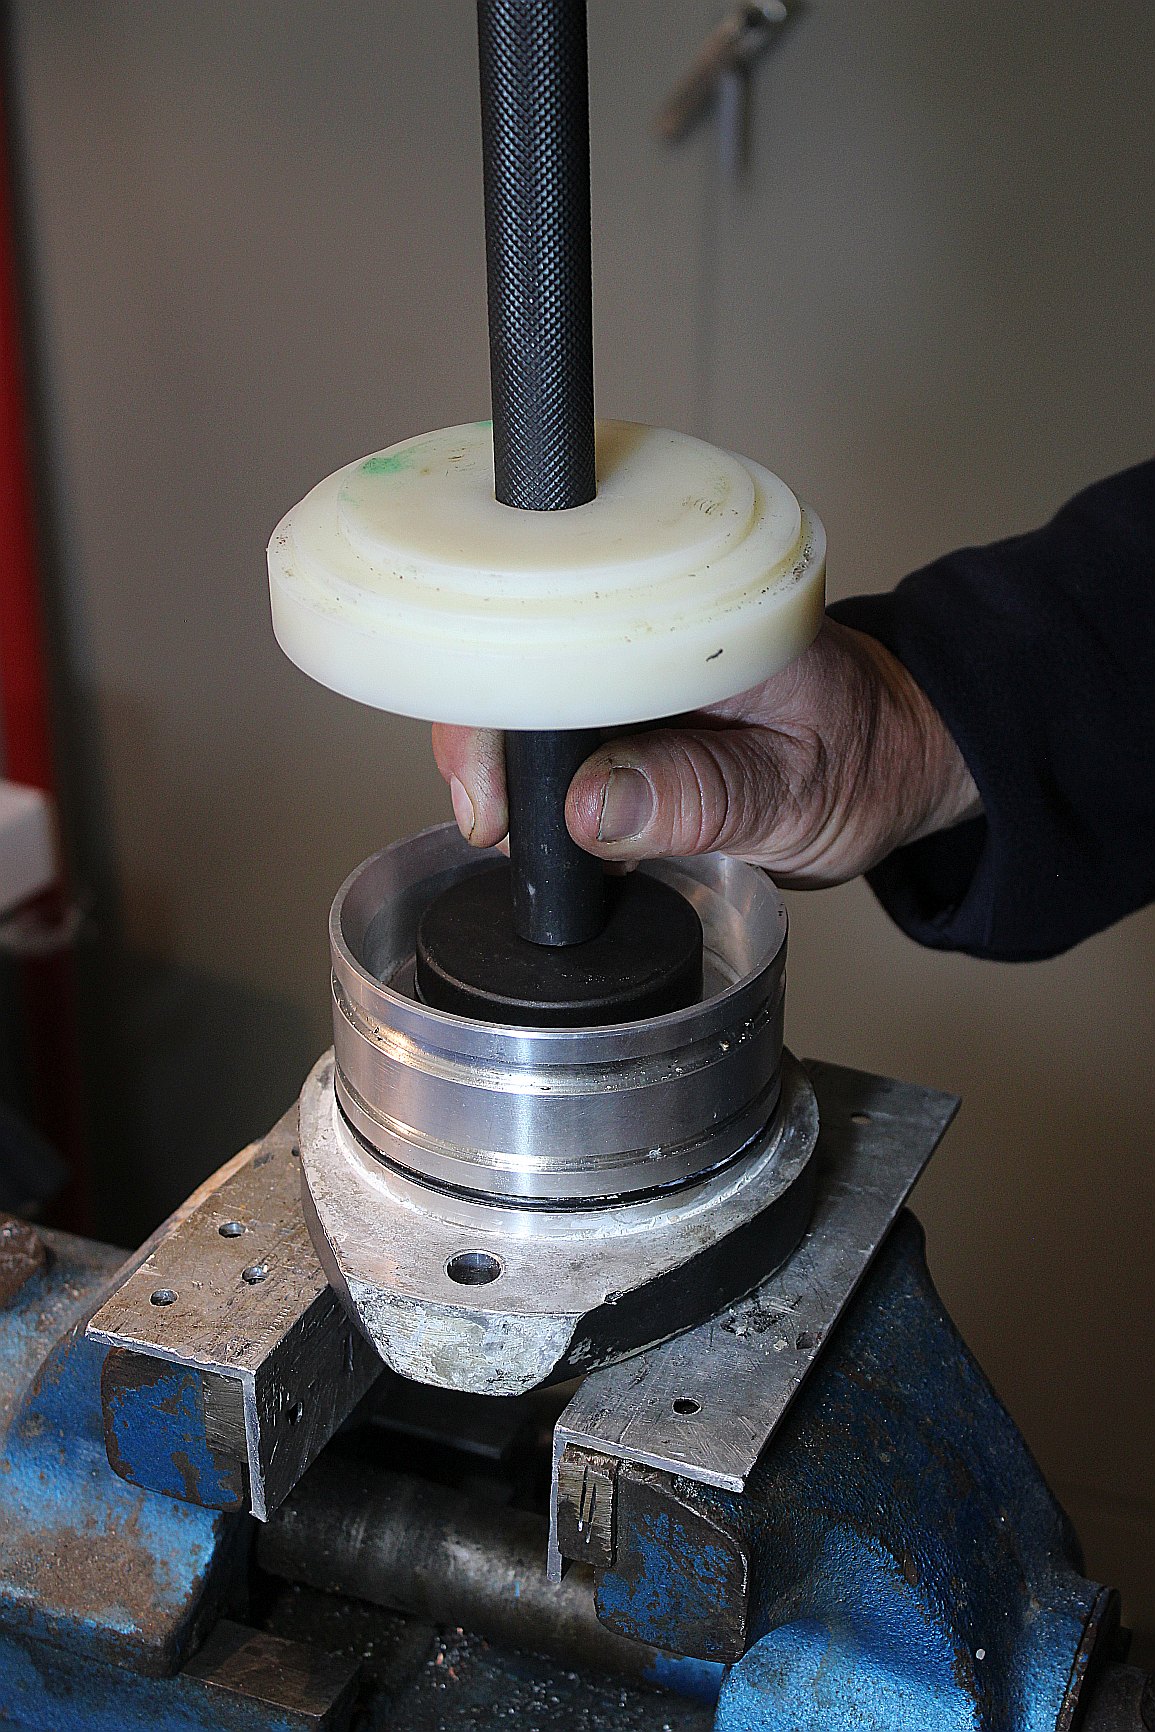
Left: The bearing ring driver is fitted with the 61mm disc and placed onto the bearing ring.
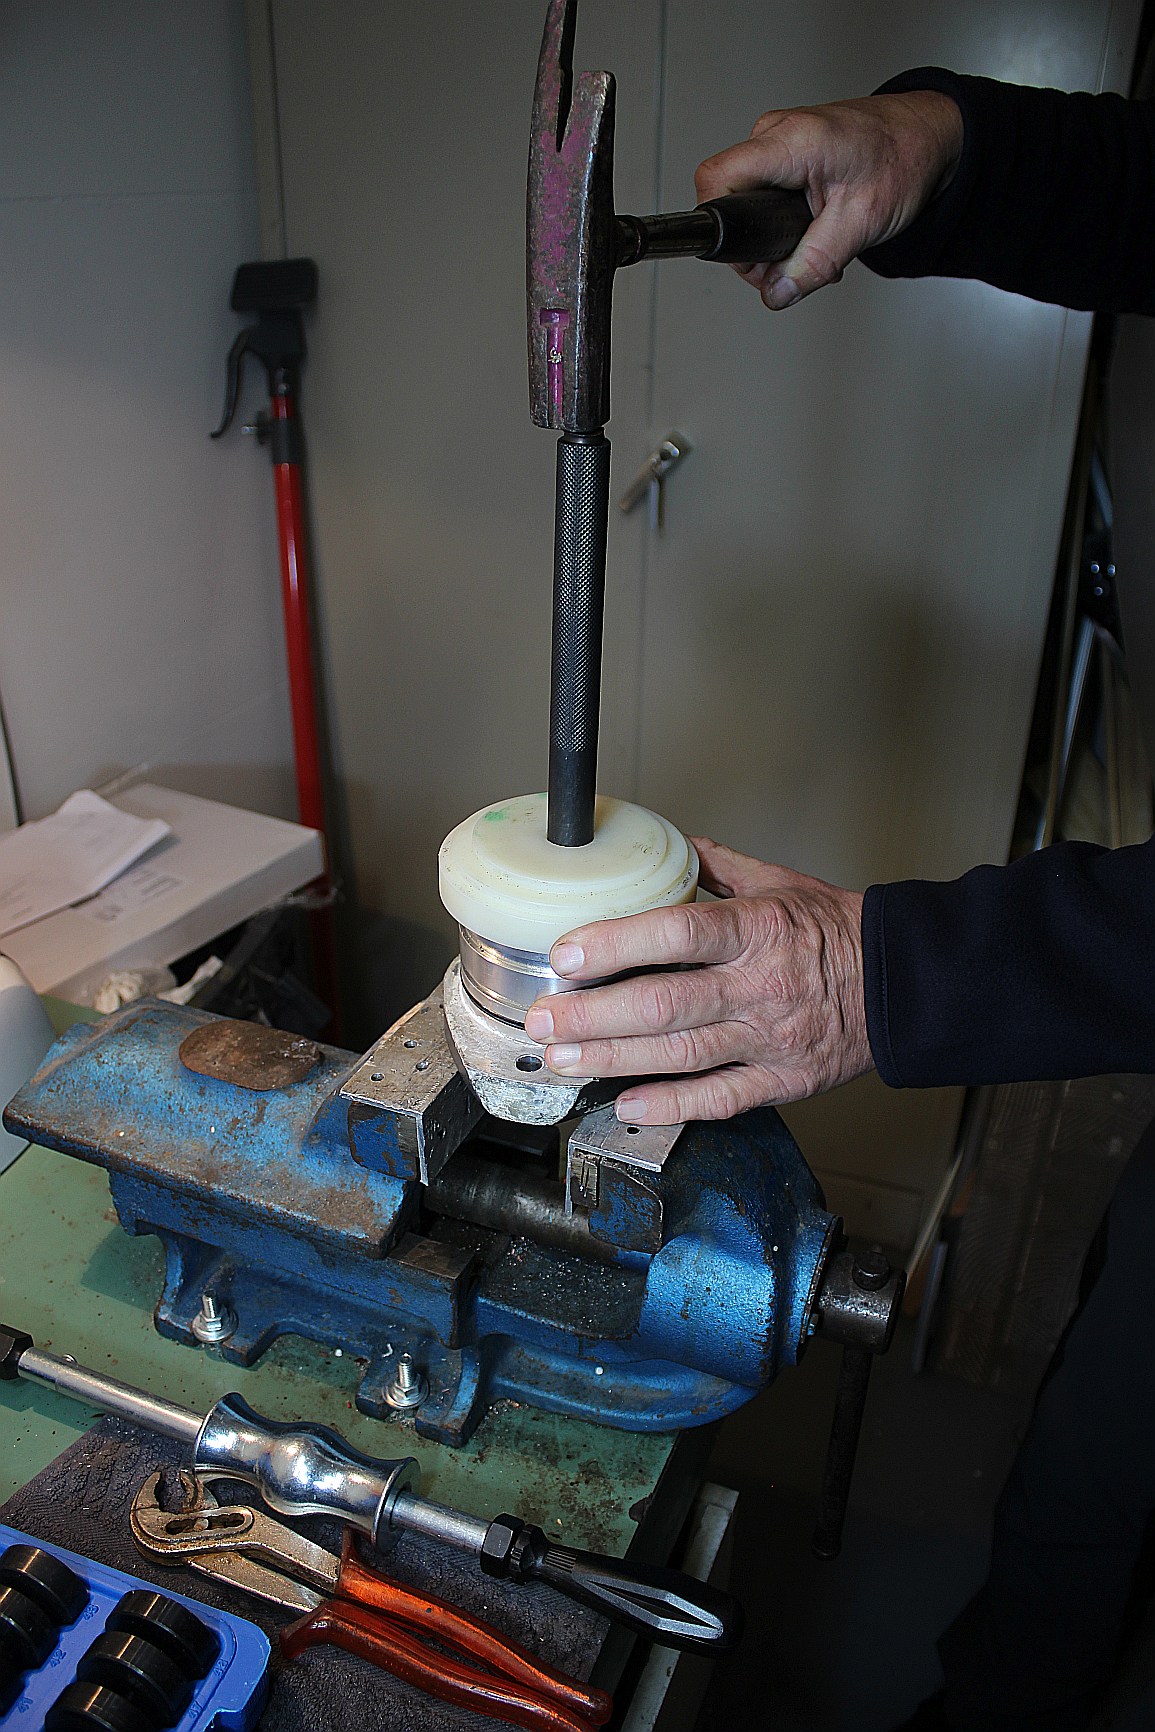
Right: Then, using the centering adapter, position the driver in the center and drive the bearing ring in with firm hammer blows.
Conclusion:
This requires a lot of specialized tools, which I don't have on board. With the help of a well-equipped Yanmar service workshop, replacing the sealing ring on the SD60 is no problem. That's also what the Yanmar aftermarket department told me.
In January 2025, I had a conference call with ZF (manufacturer of the SD60). Since ZF handed over full responsibility for the SD60 to Yanmar, all arguments must be discussed with Yanmar.
To this end, I visited Yanmar Europe in Almere, Netherlands, in July and September 2025. During my conversation with Yanmar, the Aftermarket Manager referred me to their excellent worldwide dealer network, which would support SD60 owners. But where is the competent and well-equipped Yanmar service workshop if you're located in the middle of nowhere? Is this a way of creating additional dependencies?
We have now received feedback worldwide regarding the SD60, including reports from Malaysia, New Zealand, and other locations in Southern Europe (Spain, Italy, Greece) from people experiencing problems with the sealing rings. In particular, I received reports from Greece about issues with longlines near the coast. The problem is therefore not unknown.
The propeller shaft:
If the propeller shaft of the SD60 shows noticeable wear marks, a sleeve should be installed, as already described in the repair report " Replacing the radial seals and renewing the running surface of the Yanmar SD40 / SD50 " here on the website. If the wear marks are greater than -0.3 mm, recoating the propeller shaft should be considered. I have also already reported on this here " Saildrive SD40 / SD50 drive shaft running surface refit ". (Both in german languarge)
The emergency solution:
In many conversations with sailors and experts, the following "emergency solution" was discussed, but I unanimously agree with the experts from the workshops that it is too dangerous for us sailors. To prevent laypeople among the sailors from being misled by any so-called experts, I will briefly describe the procedure, but warn against its use.
A sailor told me that, lacking the special tool shown, they put the bearing shield in the freezer and, after 6 hours, drove the bearing race out of the shield using a drift. They then cooled the bearing race back down in the freezer, installed the sealing rings, and afterwards drove the cold bearing race back into the bearing shield seat using the drift.
This might work in an emergency, but according to experts, there is a very high risk of damaging the bearing raceway, the bearing race guide, and the bearing shims during removal and installation. Therefore, I cannot recommend this solution.
Part 2: Constructive solution for easier replacement of the sealing rings.
We sailors love to travel and live a little off the beaten track, even if only for short periods during holidays. I love this independence too. While the boat is in winter storage, I'm thinking about a workable solution. The simplest solution, from a design perspective, is to use a sealing ring that fits through the bearing race.
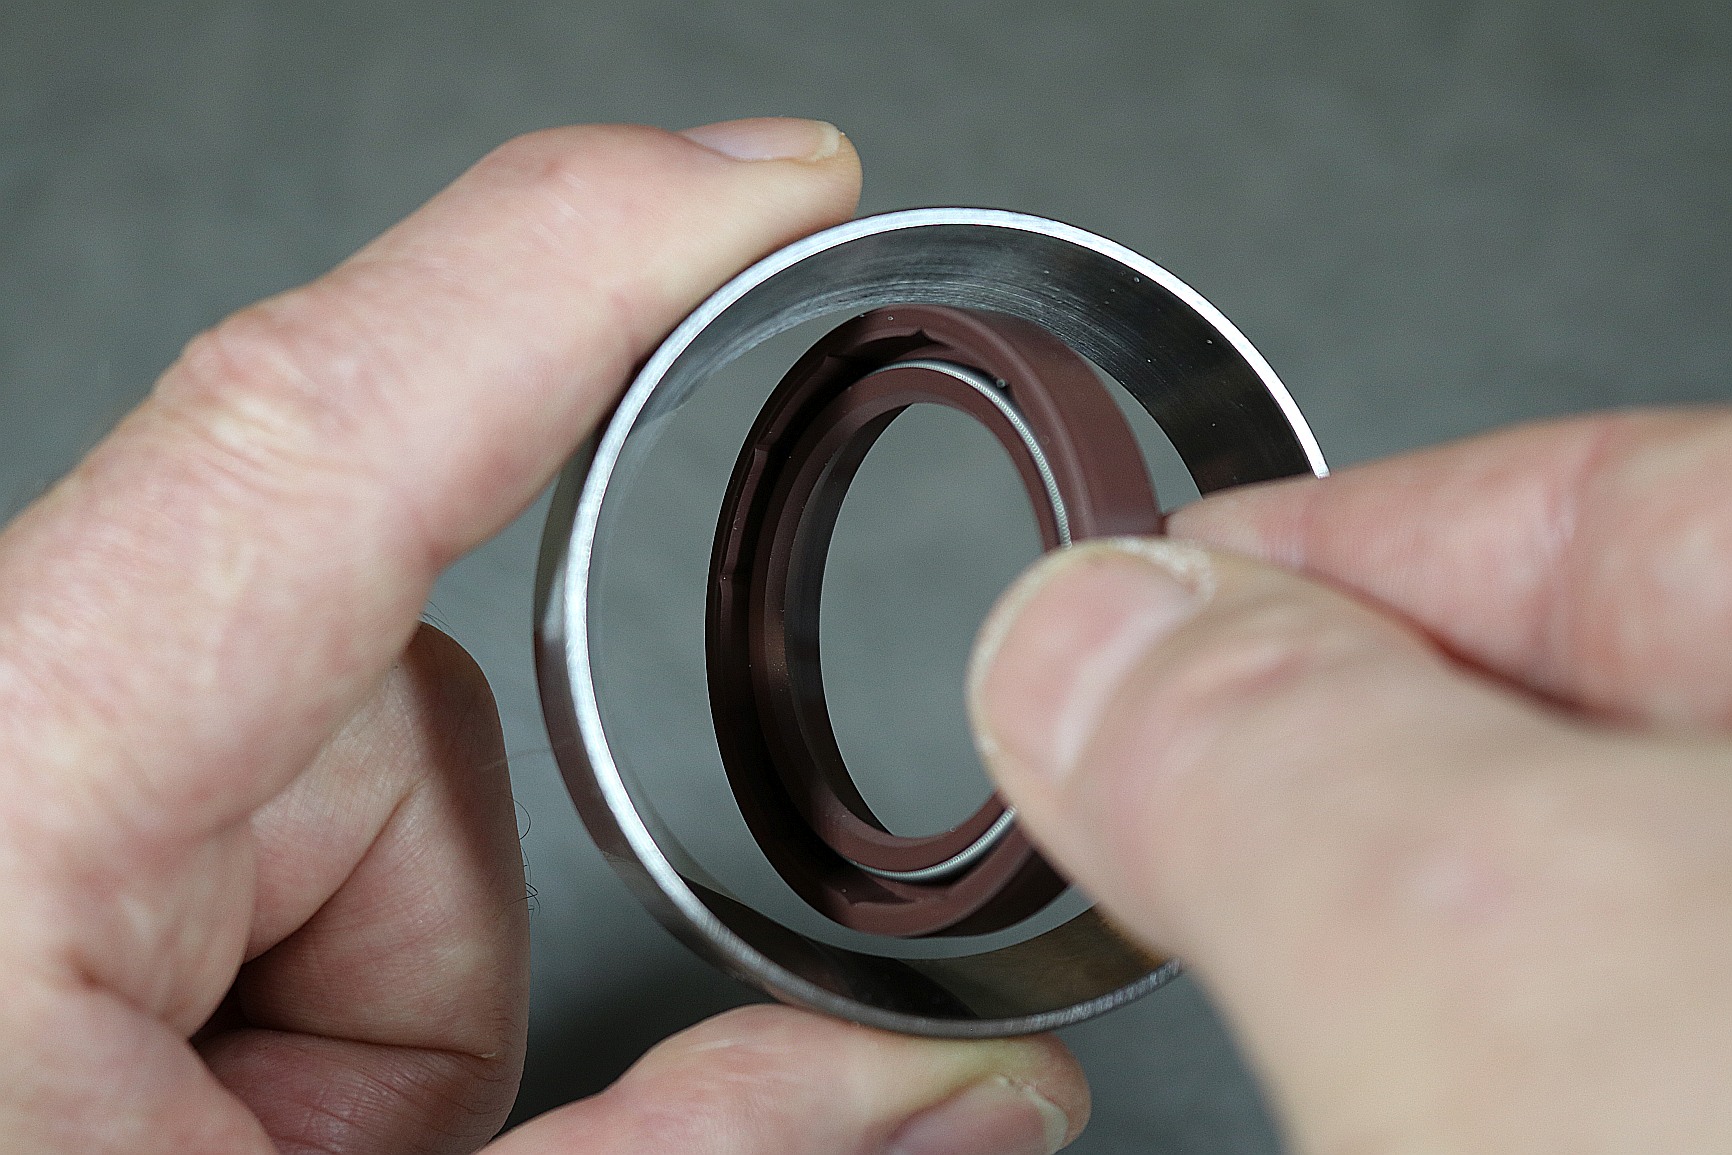
Left: Original Yanmar sealing ring does not fit through the bearing ring.
Right: Smaller sealing ring with a diameter of 48 mm.
According to Freudenberg experts, a standard sealing ring with a 48mm outer diameter is perfectly suitable. The sealing lip has comparable properties to the original size of a sealing ring with a 52mm diameter.
The goal is therefore to design a reducing sleeve. The sleeve material must be comparable to that of the saildrive to prevent the formation of a galvanic cell. It must be manufactured to fit the bearing flange and the 48mm radial sealing ring.
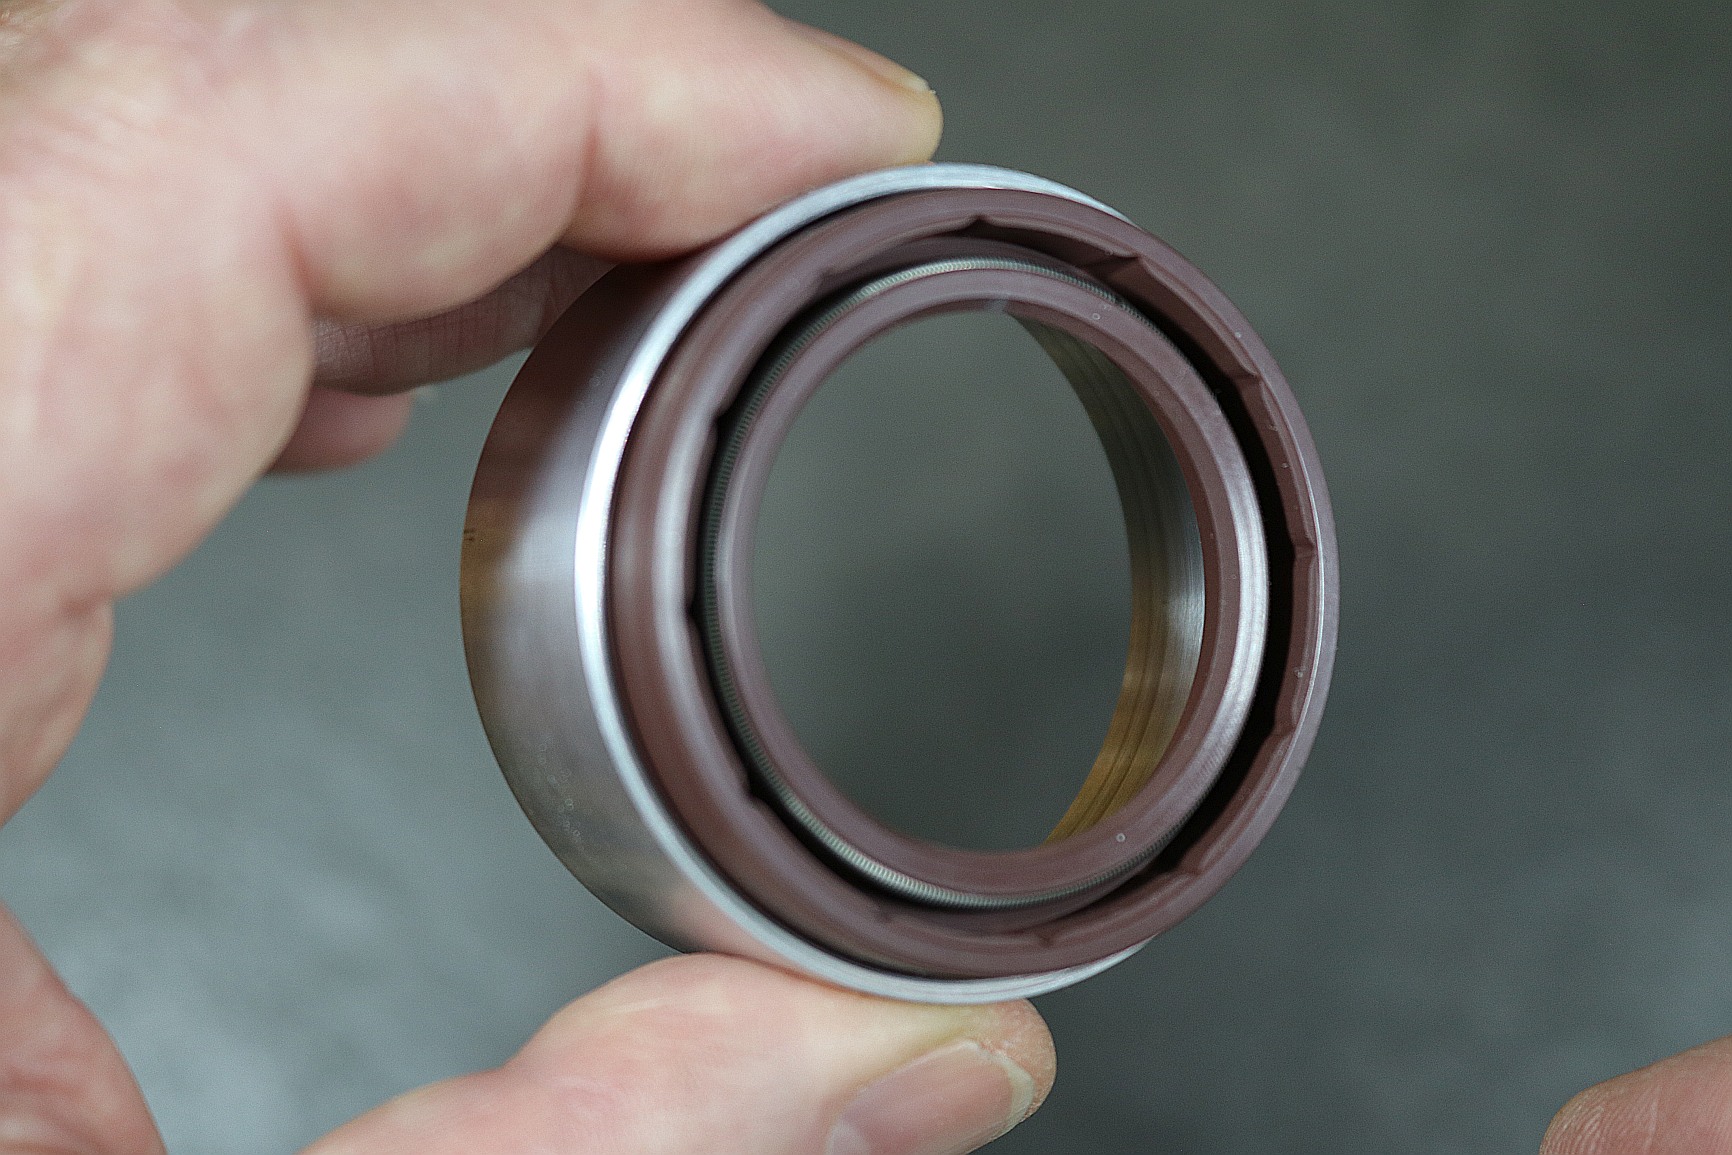
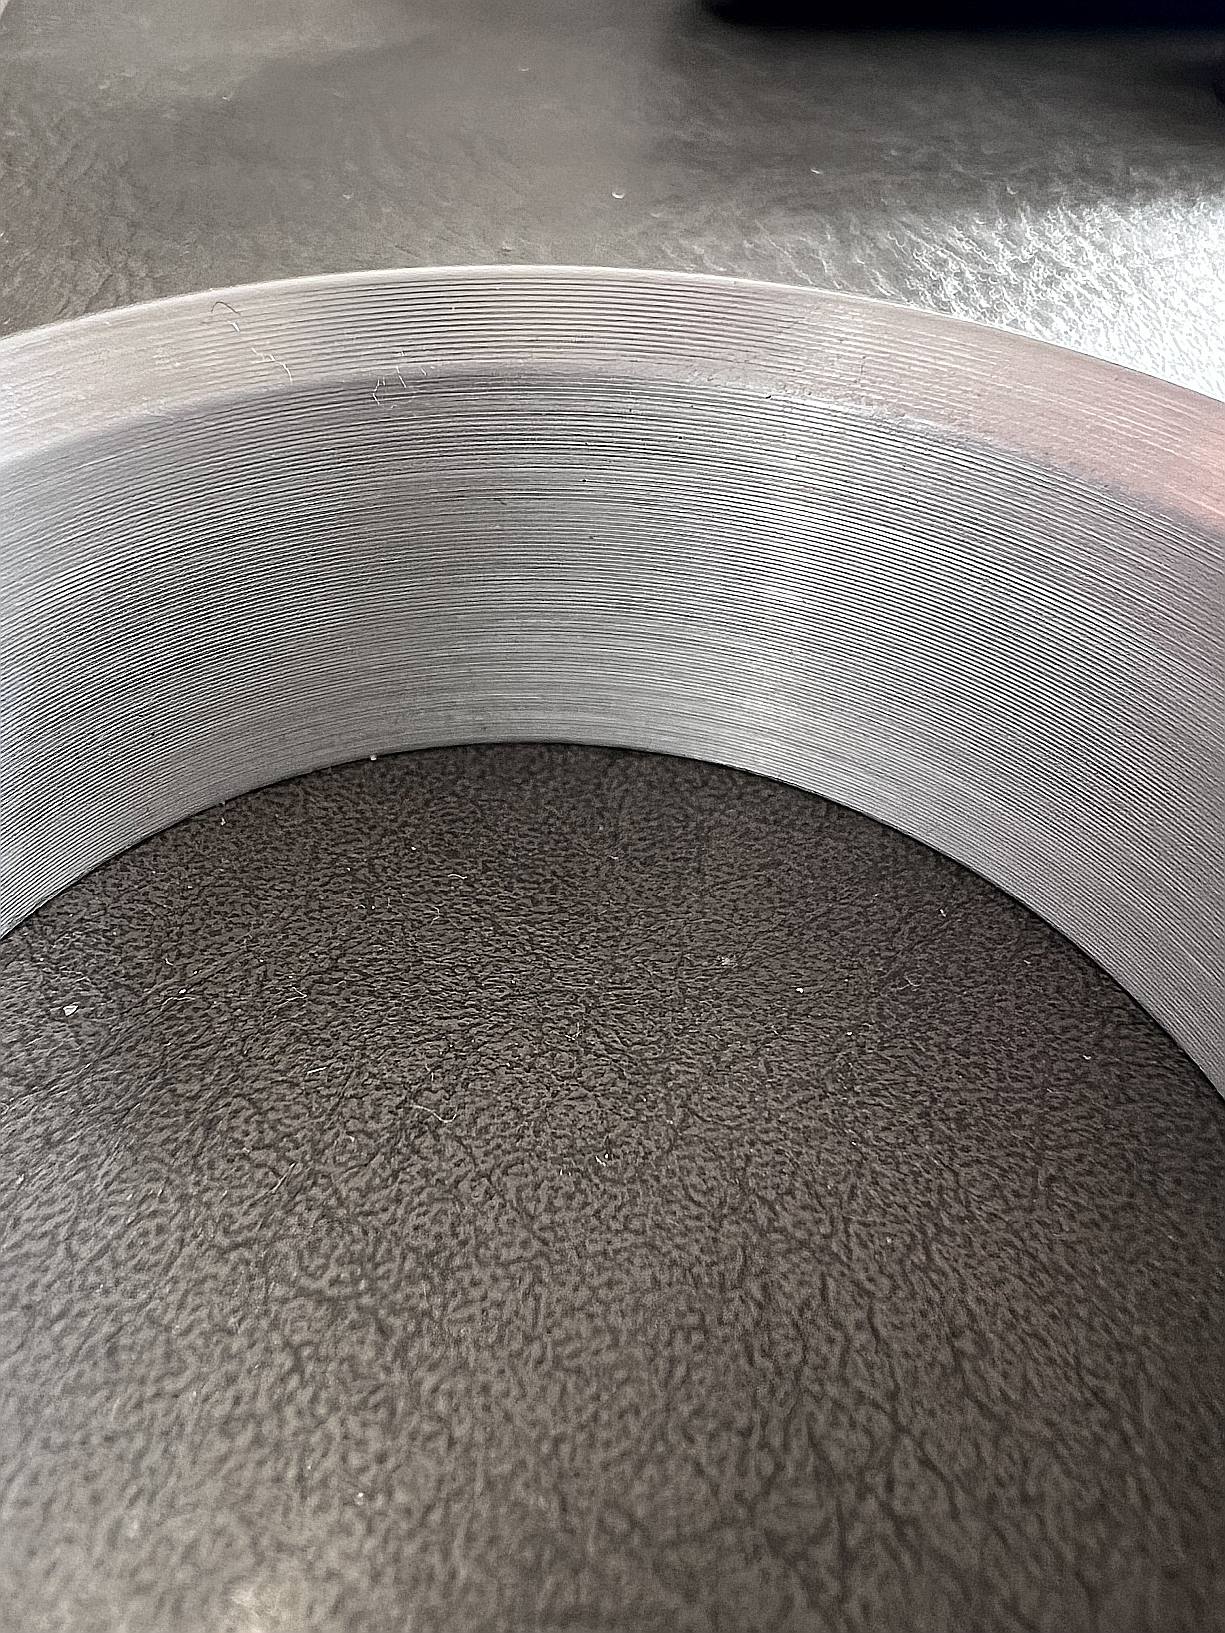
It also features a bevel to make inserting the radial sealing ring easier. For a professional CNC workshop, producing this in small batches is no problem.
Installation of the reducing sleeve:
To install the reducing sleeve, the bearing ring must now be removed one last time, as already shown. Then the sealing rings are removed and the sealing ring seats are cleaned of deposits using 600-grit sandpaper.
Then heat the bearing shield to approximately 80°C in the oven or with a hot air gun, and leave the reducing sleeve at room temperature. If the reducing sleeve were to cool down, the humidity in the air would immediately condense on its surface and act as a separating agent for the sealant.
When removing the sealing rings with a drift, the sealing ring seats could have been damaged. Therefore, as a precaution, the sleeve is thinly coated on the outside and the sleeve's seat in the bearing shield with the permanently elastic sealant Dirko HT. This seals the reducing sleeve in the bearing shield along any potential damage, preventing the ingress of seawater.
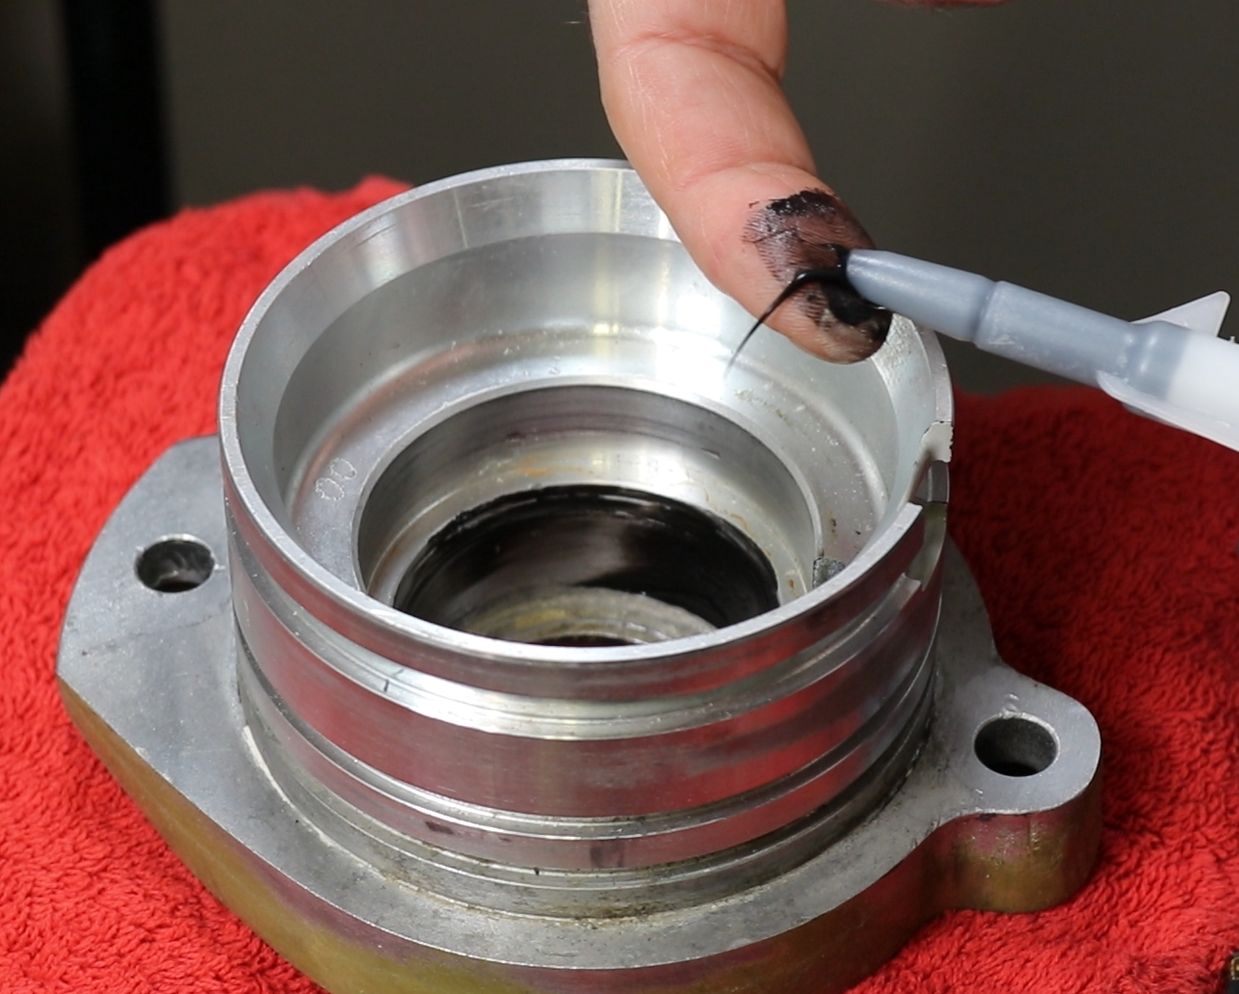
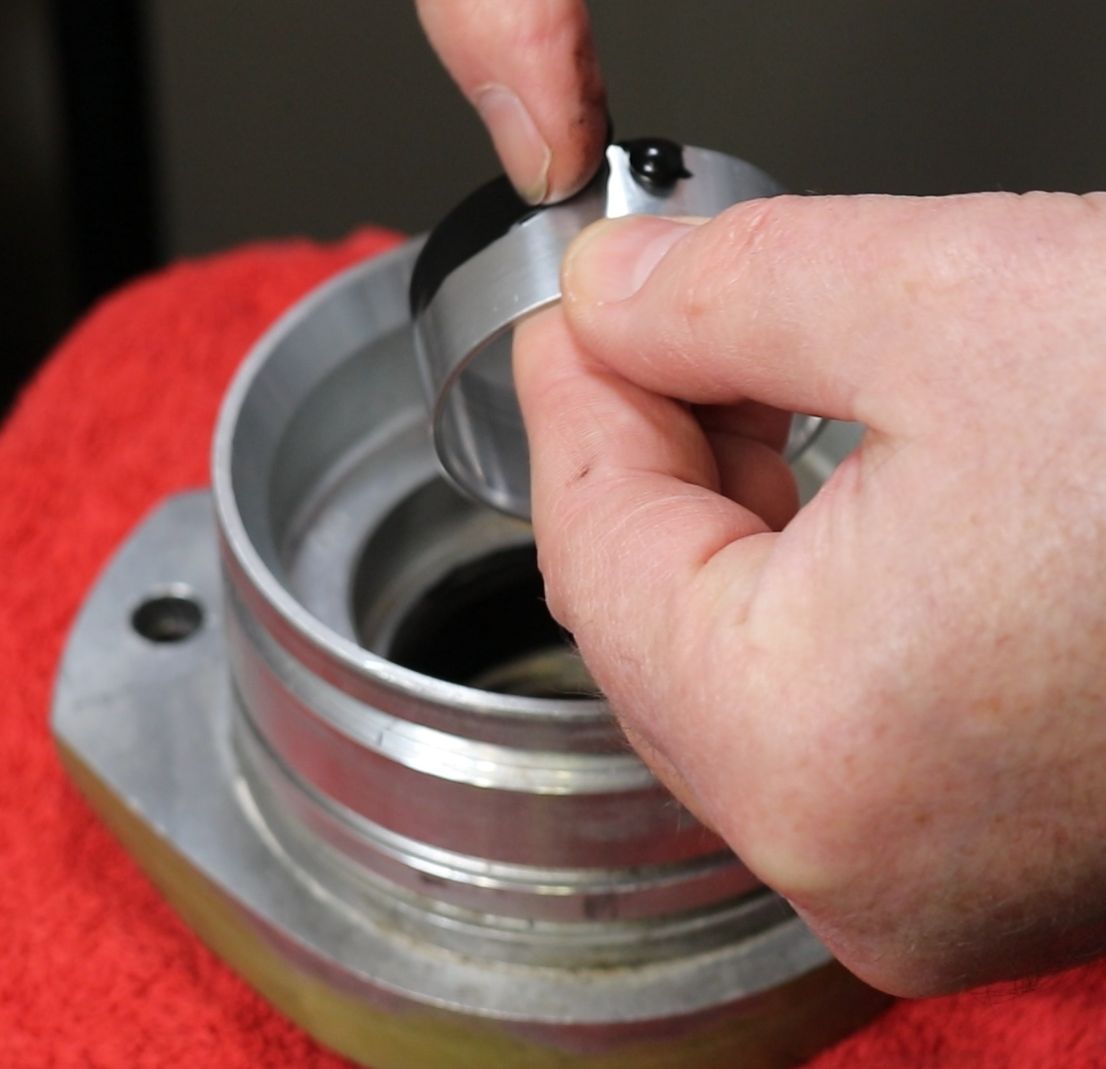
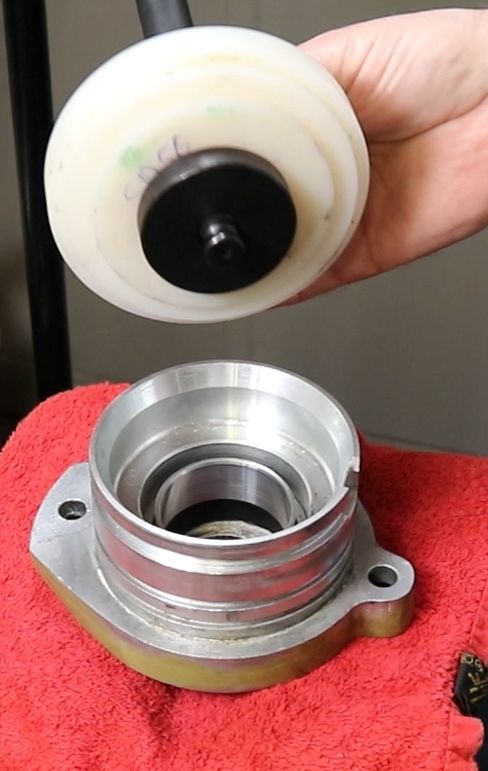
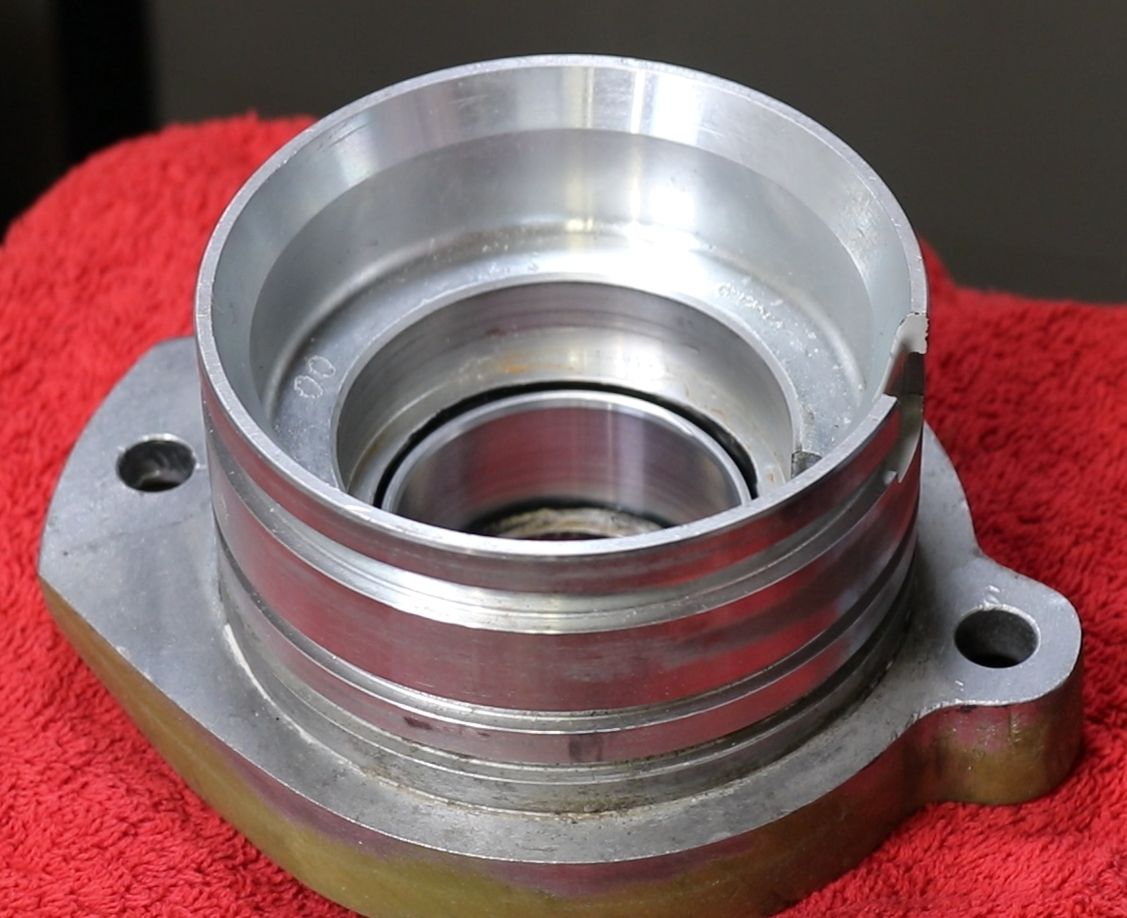
The sleeve is beveled on one side to make it easier to insert the radial sealing rings. In the pictures, the bevel points upwards (inwards towards the saildrive).
Left: Place the sleeve into the bearing plate with the angled side facing upwards. Using the driver, a 52mm punch, and the centering tool, drive the sleeve into the bearing plate.
Right: The sleeve is now seated in the bearing shield.
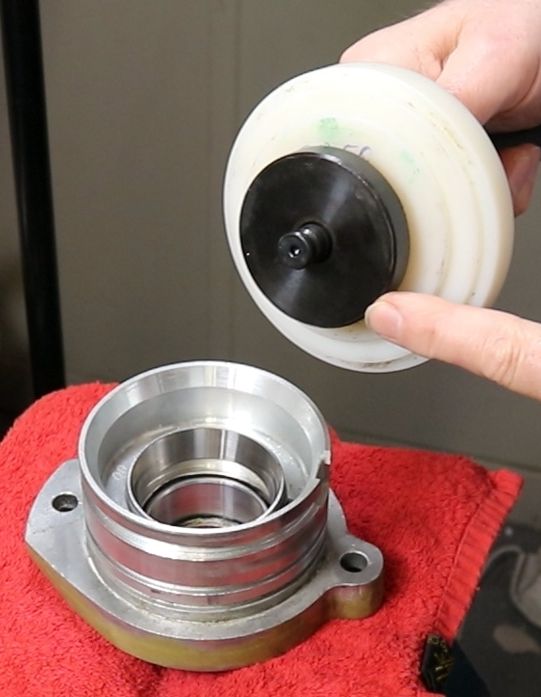
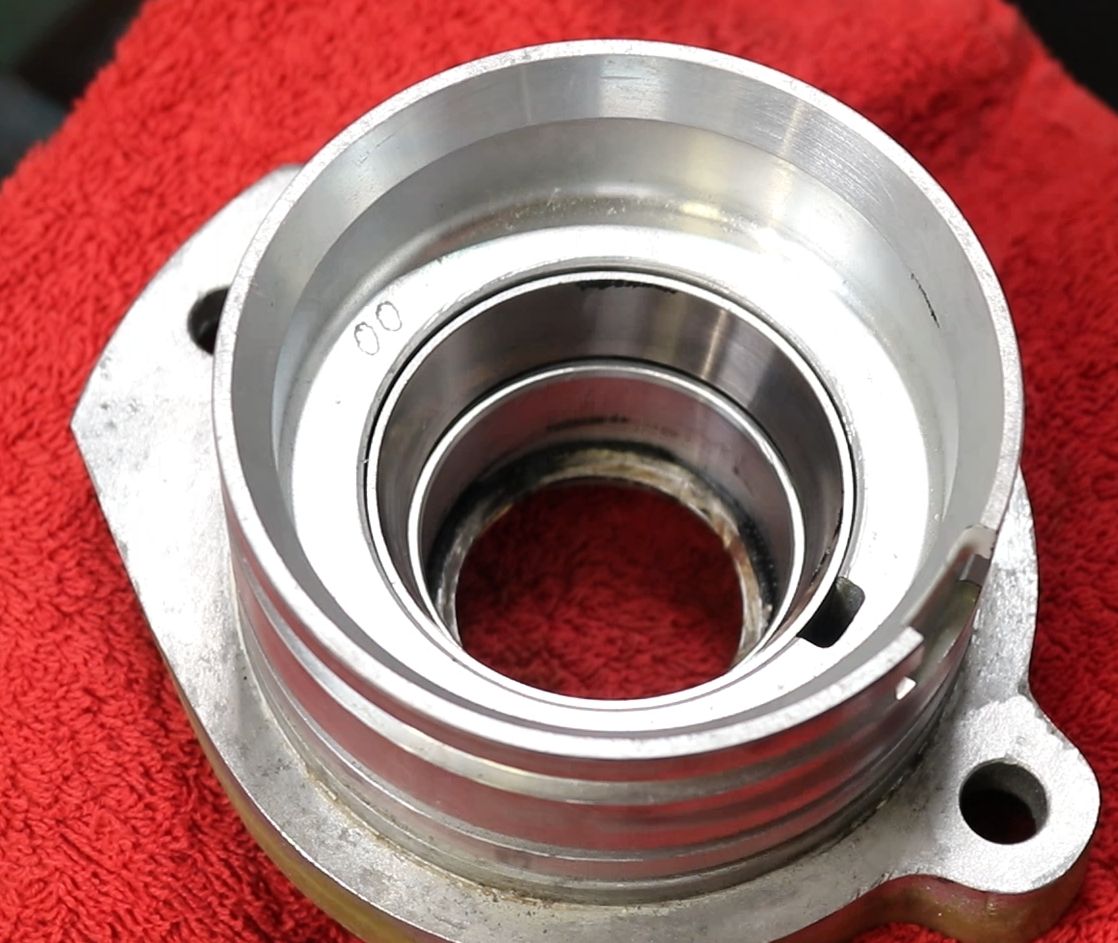
Left: Reinsert the one or two shims into the bearing plate. Then, using the drift, a 61mm punch, and the centering tool, drive the bearing race into the plate. The bearing plate is now ready to receive a 48mm bearing race.
The installation of the SD60 propeller shaft radial seal upgrade kit is now complete. The many tools shown previously are no longer needed. Replacing the radial seals is now just as easy as with an SD40/SD50 or many other saildrives on the market.
Radial seal replacement with the SD60 propeller shaft radial seal upgrade kit:
The old sealing rings are driven out of the bearing plate using a drift punch and a hammer. Please be careful not to damage the inner wall of the casing. Then clean the inner wall of the casing with 600-grit sandpaper to remove any limescale deposits, clean it thoroughly, and grease it.
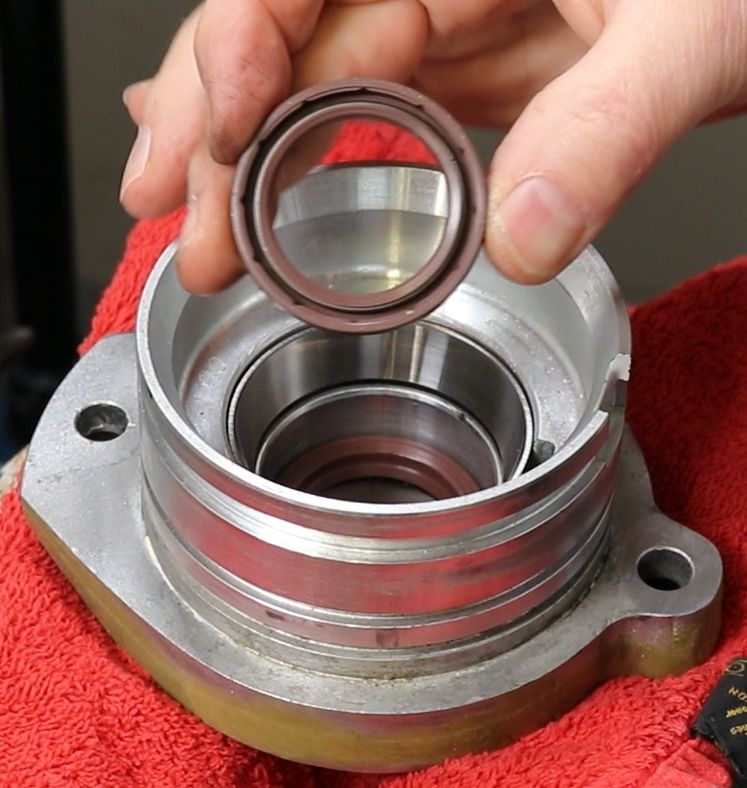
Now the two 48mm sealing rings are inserted, the first with the hose spring facing down, the second with the hose spring facing up, and individually brought into their final position using the drive-in tool from the upgrade kit.
Generously coat the sealing lips of both sealing rings with seawater-resistant grease, but do not fill the space between them. A pressure differential must be able to form.
Do not fill the sealing ring on the seawater side with grease either. The sealing lip of the radial sealing ring runs on the shaft, heats up, and is lubricated and cooled by the seawater.
Repositioning the sealing rings:
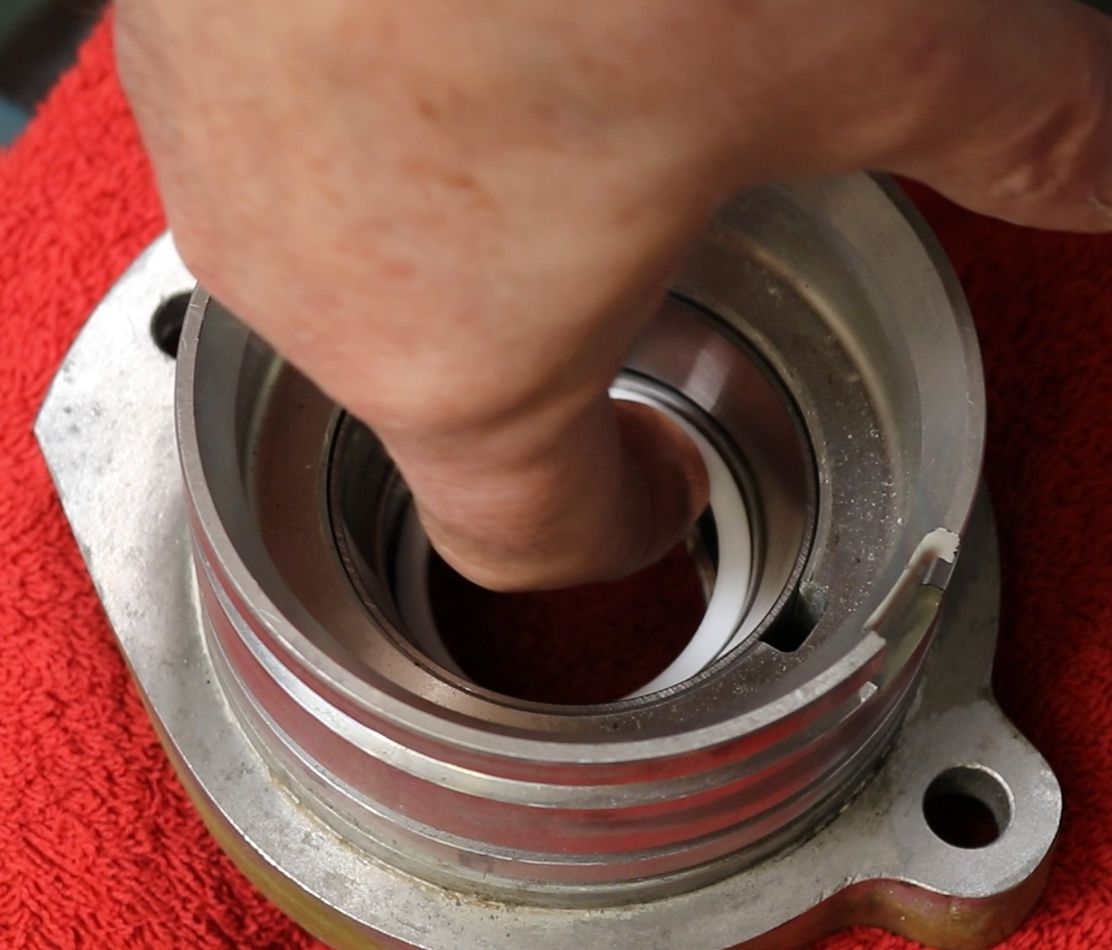
Should the propeller shaft show wear marks from the radial sealing rings of >0.3mm, the sealing rings can be offset by 2mm using a plastic washer from the upgrade kit and thus seal again on an undamaged part of the propeller shaft.
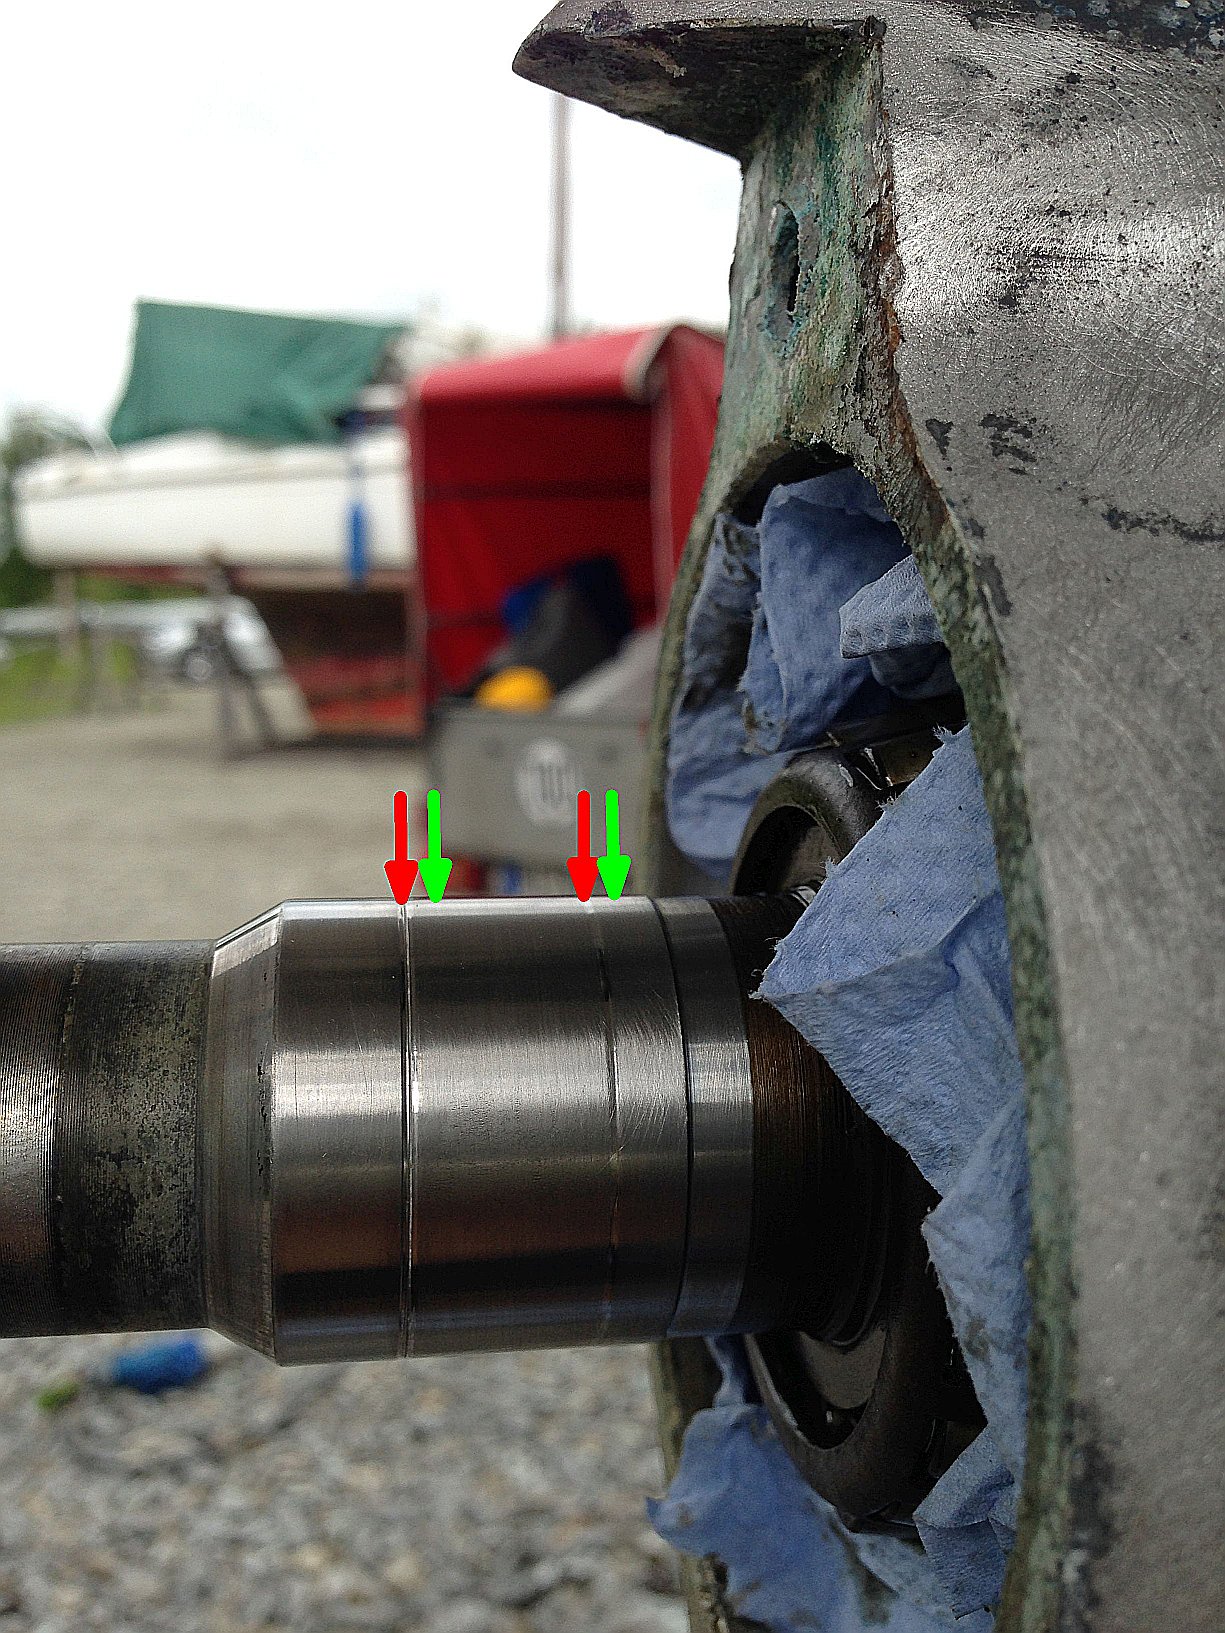
The following order has proven effective for me:
Whenever the run-in marks were measured to be >0.3mm:
The first time: Move the sealing rings 2mm away from the surface.
The second time: remove the 2mm ring; slide the sleeve onto the shaft.
On the 3rd time: Move the sealing rings 2mm onto the sleeve.
On the 4th time: Recoat (Then 20 years have passed and it's still cheaper than a new wave, if one is even available.)
SD60 propeller shaft radial seal upgrade kit:
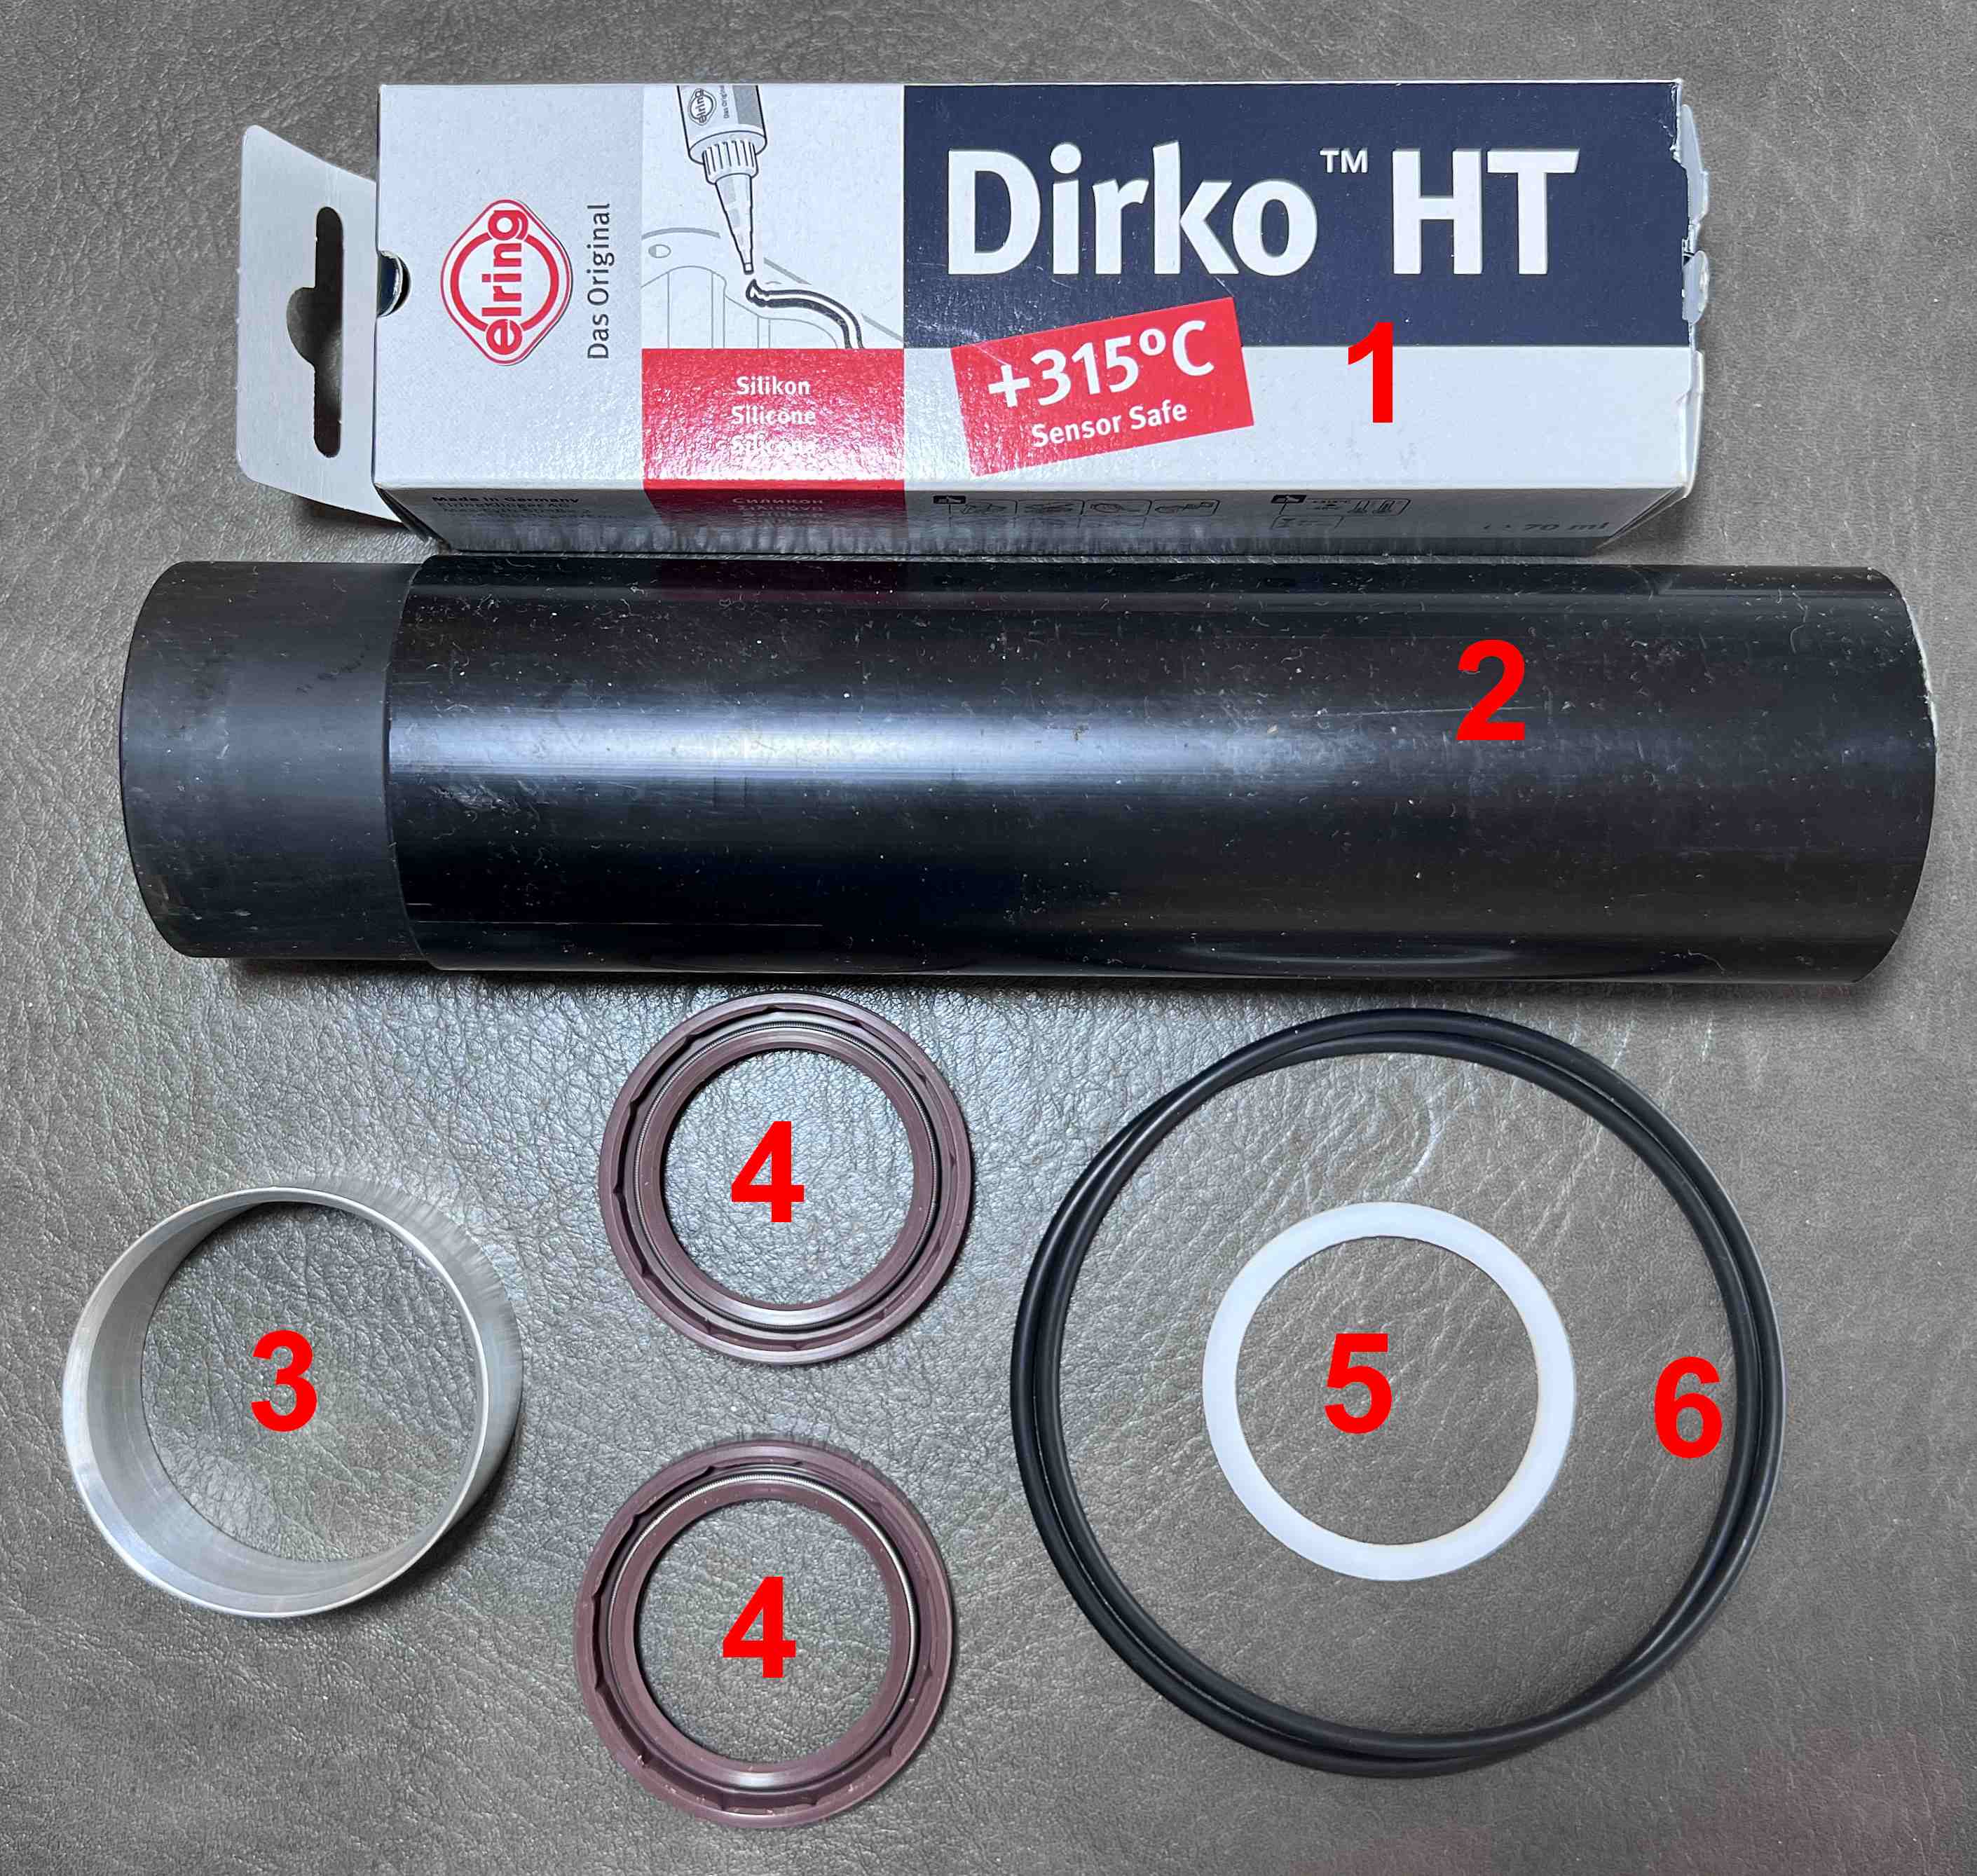
An SD60 propeller shaft seal upgrade kit includes:
- Dirko HT permanently elastic sealant
- Driver tool
- Aluminum sleeve
- Two sealing rings, 48mm diameter, fully encased in elastomer
- 2mm spacer ring.
- Two O-rings for sealing the bearing flange.
Simply download the order form , enter the quantity of the desired parts, and send me the file. (Note: The file can be edited directly in Acrobat Reader and will also perform calculations.)
Or write me an email.
Disclaimer:
This guide was written to the best of my knowledge and belief based on a repair/maintenance procedure I performed myself. The guide was carefully prepared and reviewed by me. No liability is assumed for the application of this guide or for damage caused by this guide or its components.
Copyright:
Jochen Brickwede in September 2026